
Last Updated: November 9, 2026
Quick Summary
Water damage behind bathroom walls shows up as bubbling paint, swollen skirting boards, a musty smell, loose or hollow-sounding tiles, white chalky efflorescence on grout, warped flooring near the doorway, and unexplained spikes in your water bill. These signs mean moisture is trapped inside the wall cavity, so you should trace the leak before painting or decorating over it.
- Bubbling paint is the most reliable early clue; if it feels soft or spongy, water is behind it.
- A shower leak usually starts at a failed silicone sealant joint or a cracked grout line.
- Press a pin-type moisture meter into plaster at several heights and compare wet and dry walls.
- Turn off all taps, note the meter reading, wait 30 minutes, and read again to confirm a leak.
- Re-caulk silicone sealant joints every 12 months and re-grout cracked or missing grout promptly.
Table of Contents
- 7 Signs of Water Damage Behind Bathroom Walls
- How to Detect a Leak Behind a Shower Wall
- Signs of a Leaking Shower Behind Tiles
- Moisture Detection Methods: Meters, Thermal Imaging and Meter Readings
- What to Do About a Leaking Shower
- Preventative Maintenance Checklist for Bathroom Walls
- Book a Bathroom Leak Inspection
- Frequently Asked Questions
7 Signs of Water Damage Behind Bathroom Walls
Water damage behind bathroom walls is often invisible until it has already rotted timber and soaked plaster. According to RubyHome’s water damage statistics, about 10% of homes with leaks waste roughly 340 litres of water a day, and fixing those leaks can save a homeowner around $681 a year. At WDC Services, we open up bathrooms every week and find the same story: the tiles look fine, the paint looks fine, and the wall behind them is gone.
Below, we show you the seven signs worth checking tonight, plus how to detect a leak behind a shower wall and when to call a professional.
Most guides stop at “look for stains”. That misses the point. Water travels along studs and sits in the bottom plate of a wall, so the first damage is usually structural, not cosmetic.
Here is the short version:
| Sign | What You Notice | What It Usually Means |
|---|---|---|
| Bubbling paint | Paint lifts or blisters | Moisture pushing through plaster |
| Swollen skirting | Skirting bulges at the base | Water sitting in the wall base |
| Musty smell | Damp odour that won’t clear | Hidden dampness and mildew |
| Loose tiles | Tiles sound hollow | Grout failure or membrane breach |
| Efflorescence | White chalky powder on grout | Ongoing seepage |
| Warped flooring | Floor lifts near the doorway | Water tracking under the floor |
| Unexplained bill spike | Water use jumps | A hidden plumbing leak |
Bubbling Paint, Peeling Wallpaper and Plaster Degradation
Bubbling paint is the most reliable early clue. Moisture behind the plaster pushes outward and the paint loses its grip. Press it gently. If it feels soft or spongy, there is water behind it.
Plaster degradation follows fast. Look for hairline cracks that keep returning after you patch them, and for wallpaper that lifts at the seams. Patching the surface without finding the source is a waste of time and money.
Swollen Skirting Boards and Warped Flooring
Swollen skirting boards tell you water has reached the bottom of the wall. Run your hand along the base. A firm, flat board is fine. A soft, bulging one has been wet for a while.
Warping shows up next. Floorboards may cup or lift near the bathroom door, and the subfloor can rot quietly underneath. If a skirting board crumbles when you press it, call a professional before you decorate over it.
How to Detect a Leak Behind a Shower Wall
Start with the shower itself. A shower leak usually begins at a failed silicone sealant joint or a cracked grout line, not in the plumbing.
Work through this order:
- Dry the shower completely, then run it for ten minutes.
- Check the adjacent wall for new damp patches.
- Look at the ceiling below, if there is one.
- Compare your water meter reading before and after with everything off.
- Note any musty smell that gets stronger after use.
A National Institutes of Health study on water-damaged homes found that mould, bacteria and their by-products in water-damaged homes are likely causes of health problems for occupants. That is why a damp patch is worth chasing early, not painting over.
Signs of a Leaking Shower Behind Tiles
A leaking shower behind tiles rarely shows on the surface at first. The tiles, paint and trim can all look normal while the wall frame behind them is rotting.
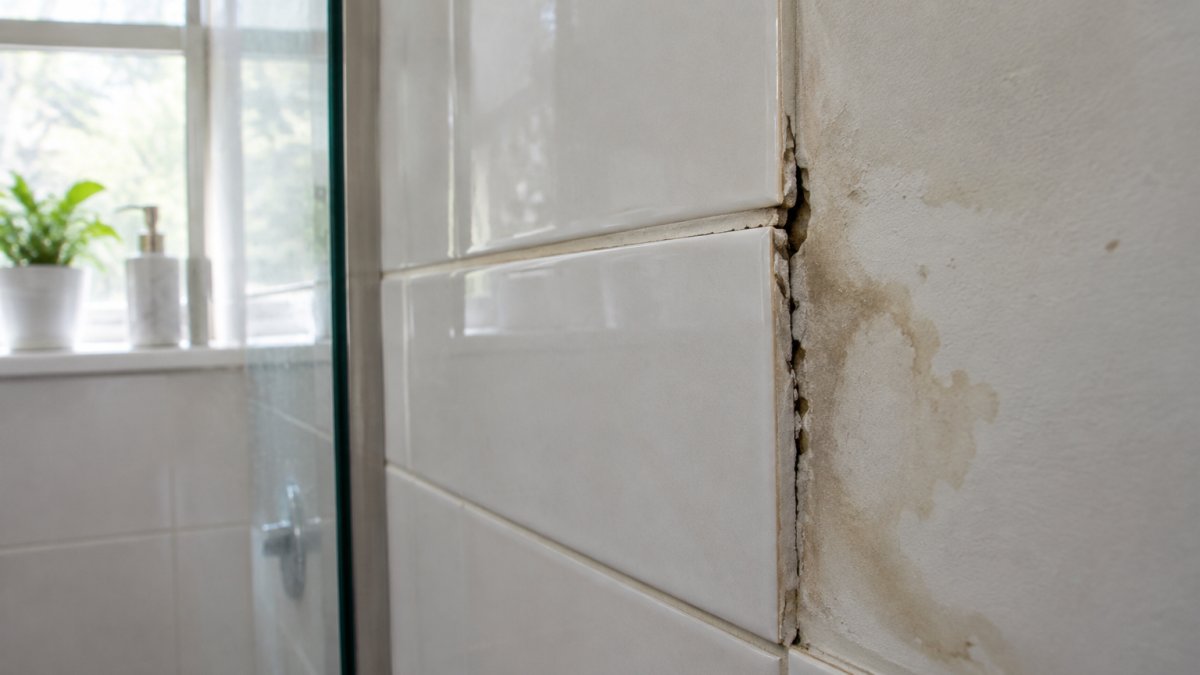
Tap each tile with a knuckle. A hollow sound means the tile has come away from the bed. Loose or drummy tiles, white efflorescence on the grout, and a musty smell that lingers after cleaning all point to water ingress.
One homeowner found the bottom plate of the wall completely rotted out during a bathroom renovation, even though the tiles, paint and trim looked fine from the outside (Robins To Go community report). Grout keeps cracking for a reason, and our guide to why bathroom tile grout keeps cracking explains the causes and fixes.
Moisture Detection Methods: Meters, Thermal Imaging and Meter Readings
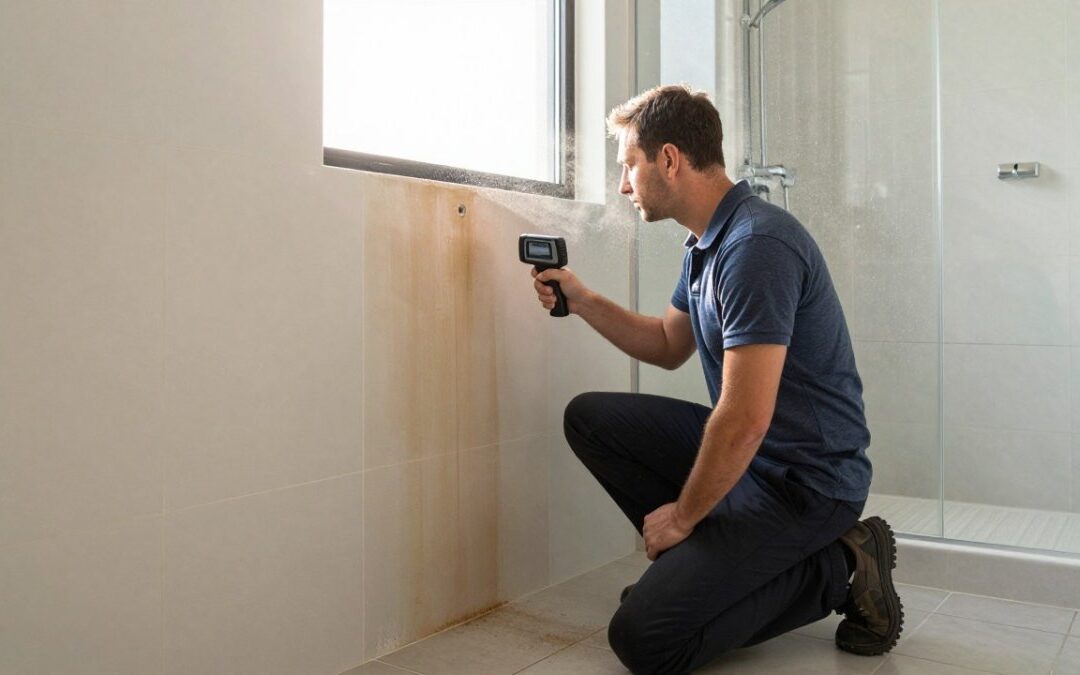
A moisture meter is the cheapest way to check a wall yourself. Buy a pin-type meter, press the pins into the plaster at several heights, and compare readings between the wet area and a dry wall in another room. Rising numbers near the shower confirm moisture intrusion.
Thermal imaging can help locate suspect areas without cutting into the wall, but it does not confirm moisture on its own and is best used alongside a moisture reading.
Be aware that a moisture meter can give false high readings on freshly cleaned or painted surfaces.
Watch your water bill too. An unexplained spike is one of the most common signs of a hidden leak, since water is escaping somewhere you cannot see. If your meter still moves with every tap off, you have a leak. To test: turn off all taps and appliances, note the meter reading, wait 30 minutes, and read again. Any movement means water is escaping. A meter that keeps moving can confirm a leak, while stains, peeling paint, or musty odors may help with identifying hidden water damage elsewhere in the home.
A National Institutes of Health study on water-damaged homes found that mould, bacteria and their by-products in water-damaged homes are likely causes of health problems for occupants. That is why a damp patch is worth chasing early, not painting over.
What to Do About a Leaking Shower
Stop using the shower first. Every extra use pushes more water into the wall cavity and spreads the damage sideways.
Then take these steps:
- Turn the shower off and dry the area
- Photograph every stain, bubble and loose tile
- Note the dates you first noticed each sign
- Check whether your home insurance covers escape of water
- Get the leak traced before any cosmetic repair
Documentation matters. Insurers ask when the damage started and what caused it, so keep your photos and notes together. If you want to understand repair and waterproofing costs before you hire, our bathroom waterproofing cost guide for Camberwell sets out what a permanent repair involves.
Preventative Maintenance Checklist for Bathroom Walls
Waterproofing fails slowly, so a small habit list saves a large repair bill. Re-seal, re-grout and ventilate on a schedule. But prevention also means knowing what to look for on different wall materials, and documenting what you find, because insurers ask for evidence.
Material-specific indicators
- Drywall (plasterboard): Soft spots, bubbling paint, and a hollow sound when tapped. Drywall is the most vulnerable; it wicks water upward and loses structural strength when wet. Check the bottom 300 mm of any wall adjoining a shower.
- Cement board: Efflorescence (white chalky powder) on the surface, crumbling at edges, and tiles that sound drummy. Cement board resists water but not prolonged saturation; if it stays wet, it can disintegrate.
- Plaster (lath and plaster): Hairline cracks that reappear after patching, a musty smell that worsens after showers, and wallpaper lifting at seams. Plaster is common in older homes and hides moisture well until the lath rots.
Preventative maintenance checklist
- Re-caulk silicone sealant joints every 12 months
- Re-grout cracked or missing grout promptly
- Run the exhaust fan during and after every shower
- Wipe down walls to limit standing dampness
- Check under the vanity and behind the toilet yearly
- Watch the water bill for sudden jumps
- Test your moisture meter on a dry wall monthly to ensure it is calibrated
- Photograph any new stain or bubble with a date stamp
Documentation for insurance
If you find damage, document it immediately. Insurers typically ask for photos, dates, and a description of when you first noticed each sign. Keep a folder (digital or physical) with: dated photos of every stain, bubble, or loose tile; notes on when the damage appeared and whether it worsened after use; receipts for any temporary repairs; and a written timeline. This is not about blame, it is about proving the damage is sudden and accidental (escape of water) rather than long-term neglect, which many policies exclude. Check your policy wording for ‘escape of water’ cover and any requirement to mitigate further damage.
The waterproofing membrane behind the tiles is the real barrier. If it was installed poorly or has passed its life, no amount of surface sealing will hold. Our guide on installing waterproof membranes for bathroom floors covers how a correct membrane is laid.
Book a Bathroom Leak Inspection
Book an inspection when you cannot find the source, when the damage keeps returning, or when a wall feels soft. A proper inspection traces the leak, opens the wall where needed, and gives you a written scope before any work starts.
WDC Services offers full project management for bathroom renovation, including expert electrical work, carpentry, waterproofing and tiling, so you have one point of contact instead of chasing separate trades.
If you are choosing who to hire, our guide on how to choose a bathroom renovation contractor walks through the questions worth asking. Then call us and we will take it from there.
Found a soft skirting board or a stain that keeps coming back? Do not paint over it. WDC Services offers full project management, expert waterproofing and tiling, and electrical work to help you fix the cause, not the symptom.
Disclaimer
Please note this advertisement has been AI generated for entertainment and leed generation purposes and In some cases may not reflect the companies exact services and information.
Prior to engaging the company it is recommended that you seek clarification on some or all points in this advertisement .
Wdc services has many 5 star google reviews that can be used as a reliable and true testimony to the quality services proved to its customers over many years.
Contact Domenico ( Dom ) Crupi on 0425801005 or email info@wdcservices .com.au for further information
Frequently Asked Questions
What are the signs of water damage behind bathroom walls?
Look for bubbling paint, peeling wallpaper, soft or spongy plaster, swollen skirting boards, loose or hollow tiles, white chalky efflorescence on masonry, and a persistent musty smell. Water stains on ceilings below the bathroom and unexplained spikes in your water bill also point to a hidden leak. Because water damage behind bathroom walls often stays hidden behind intact tiles and paint, these surface clues matter: research shows structural rot can develop long before anything visible appears.
Can water damage behind bathroom tiles be hidden?
Yes, and it often is. In a bathroom renovation, the bottom plate of a wall can be completely rotted out while the tiles, paint and trim look normal from the outside. Grout failure and worn silicone sealant let water seep behind the waterproofing membrane, where it sits against timber framing. That is why visual inspection alone is unreliable, and why moisture meters or thermal imaging are worth using when you suspect a problem.
Should I stop using the shower if I suspect a leak?
Stop using the shower until the source is confirmed. Every extra shower adds more moisture intrusion behind the tiles and raises the risk of mould spores spreading through the wall cavity. Switch to another bathroom or sponge baths, and arrange an inspection before resuming normal use.
Can a bathroom leak cause mould behind the wall?
Yes. Trapped dampness behind tiles creates the conditions mould needs, and a musty smell is one of the clearest early indicators. If you notice a musty odour that lingers after cleaning, treat it as a sign of hidden moisture and get the wall cavity checked.

Disclaimer: Disclaimer, Please note this advertisement has been AI generated for entertainment and leed generation purposes and In some cases may not reflect the companies exact services and information. Prior to engaging the company it is recommended that you seek clarification on some or all points in this advertisement. WDC Services has many 5 star google reviews that can be used as a reliable and true testimony to the quality services proved to its customers over many years. Contact Domenico ( Dom ) Crupi on 0425801005 or email info@wdcservices .com.au for further information.