
Last Updated: October 30, 2026
Quick Summary
To install waterproof membranes for bathroom floors, prepare a sound, clean, fully cured and primed substrate, then detail corners, wall-floor junctions and the floor waste with reinforcing tape before applying two or more even coats at right angles. Wait the full stated interval between coats and confirm full cure before tiling.
- AS 3740-2021 requires waterproofing the whole bathroom floor, not just the shower area.
- Embed reinforcing tape into wet membrane at corners, joints and wall-floor junctions first.
- The floor waste is the most common leak point, so follow the manufacturer’s drain detail.
- Dry to touch is not the same as ready to tile; wait for full cure.
- Document products, coats, photos and any flood test before tiles go down.
Table of Contents
- How to Prepare a Bathroom Floor for Waterproofing
- Bathroom Waterproofing Tools List
- AS 3740-2021 Waterproofing Requirements
- Step-by-Step Membrane Application
- Waterproofing Membrane Drying Time
- Common Installation Mistakes and How to Avoid Them
- Book Your Professional Waterproofing Inspection
- Frequently Asked Questions
How to Prepare a Bathroom Floor for Waterproofing
Getting the substrate right is the whole job. Waterproof membranes will only perform as well as the floor beneath them, so preparation deserves more time than most people give it. Poor preparation is a common cause of membrane failure, more often than the product itself.
Here is how to prepare a bathroom floor for waterproofing:
- Strip the floor back. Remove old tiles, adhesive, screed lumps and loose material. The substrate must be sound and structurally stable.
- Fill and fair. Patch cracks, holes and low spots with a suitable repair mortar. Grind high points flat.
- Clean the surface. Vacuum and wipe away dust, oil, silicone and curing residue. A clean surface is non-negotiable.
- Check moisture and dryness. New screed must be fully cured before membrane goes down. Damp substrate traps moisture under the membrane and causes blistering.
- Check falls to the floor waste. Water must drain toward the outlet, not pool in the middle of the room.
- Prime the substrate. Apply a surface primer suited to the membrane system, then let it dry as the product instructions state.
Watch out: skipping the moisture check is the most common reason a new membrane bubbles and lifts within months. If you are unsure whether the screed is ready, stop and get it checked.
If you want to see how this stage fits the bigger picture, our guide to the bathroom renovation process step by step sets out the full sequence and timeline.
Bathroom Waterproofing Tools List
Having the right gear on hand before you open a bucket saves a second trip and a ruined first coat.
| Tool | What It’s For |
|---|---|
| Primer and roller | Sealing the substrate before membrane |
| Liquid membrane | Roller or brush application across the floor |
| Brush (wide) | Cutting in corners, junctions and around the drain |
| Notched trowel | Spreading membrane at consistent thickness |
| Reinforcing tape or bandage | Bridging corners, joints and wall-floor transitions |
| Painters tape | Masking edges and protecting adjacent surfaces |
| Moisture meter | Checking substrate readiness |
| Clean rags and vacuum | Surface prep between coats |
Two things people forget: a moisture meter and enough reinforcing tape. Both are cheap, and both prevent the failures that cost the most to fix.
AS 3740-2021 Waterproofing Requirements
AS 3740-2021 is the Australian Standard that sets out waterproofing requirements for domestic wet areas, including bathroom floors. It covers where membrane must be installed, how it must perform, and how the system should be detailed around junctions and penetrations.
The standard is useful reading for anyone planning wet-area waterproofing, as it sets out the requirements that building surveyors and inspectors commonly refer to. The Australian Building Codes Board publishes guidance on how waterproofing fits within the National Construction Code, and Standards Australia holds the current edition of AS 3740-2021.
Key points to understand:
- Waterproofing requirements apply to the whole bathroom floor, not just the shower area.
- Wall-floor junctions, corners, joints and penetrations need specific treatment.
- The installed system must meet the standard’s performance criteria, and product instructions must be followed.
- Documentation of what was installed matters if you ever sell or renovate again.
Confirm the current edition and any local requirements before work starts. Standards get updated, so it is worth checking that you are working from the current edition.
Step-by-Step Membrane Application
Applying waterproof membranes is a sequence, not a single task. Rush one step and the whole system is compromised. Follow the product instructions for your specific membrane and use this order. The details below cover the whole bathroom floor, not just the shower, because leaks often start at junctions and drains outside the shower area.
- Confirm the primed substrate is dry and clean. Any dust or dampness will hurt adhesion. Vacuum, then wipe with a damp cloth and let it dry.
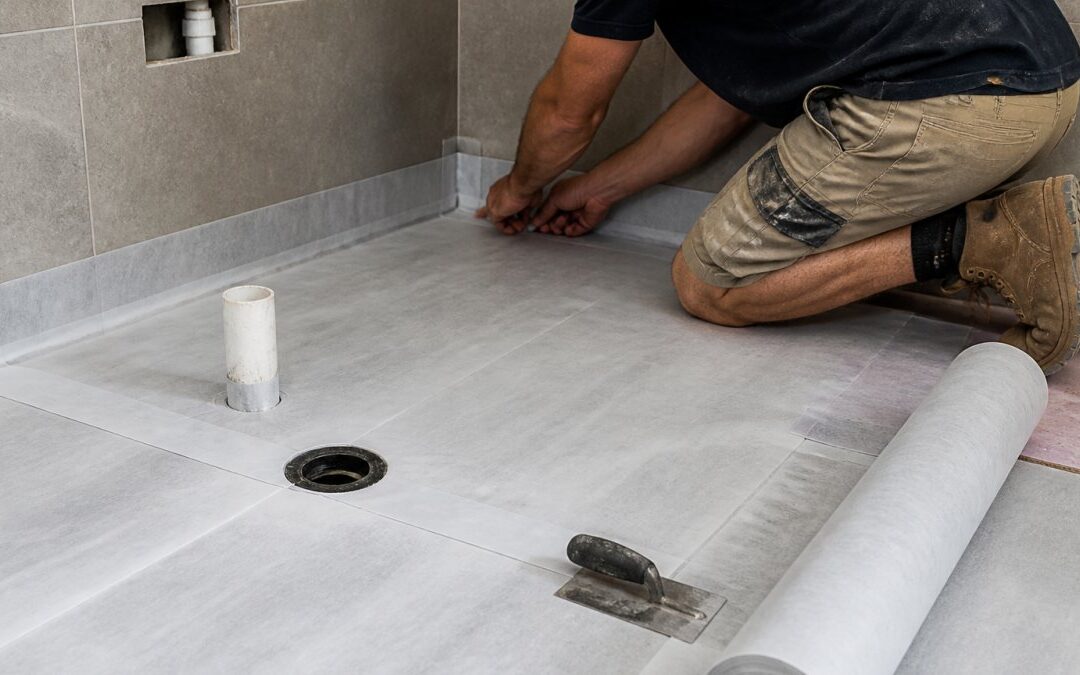
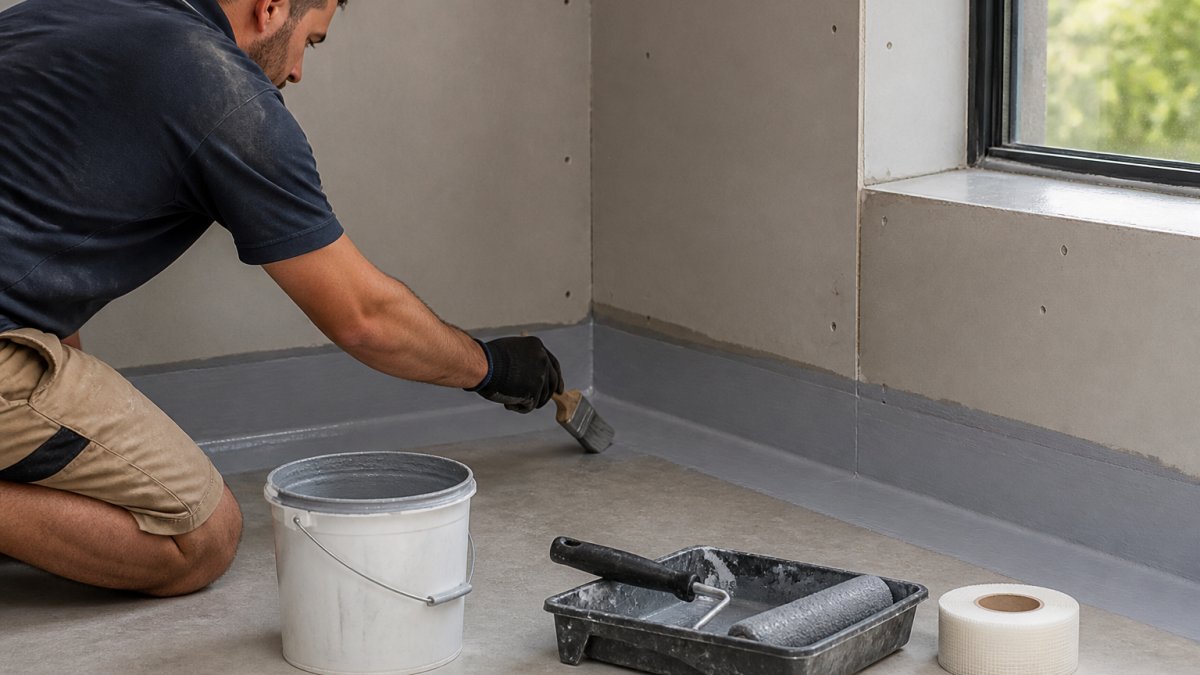
- Detail the critical junctions first. Apply reinforcing tape or bandage to corners, floor-to-wall junctions, joints and around the floor waste. Embed it into a first pass of membrane while it is still wet, then smooth out wrinkles with a brush.
- Cut in with a brush. Brush membrane into corners, around the drain and along the wall-floor transition before rolling the open floor. A wide brush gives you control where a roller cannot reach.
- Detail the floor waste. This is the single most common leak point. Follow the membrane manufacturer’s drain detail: typically a collar or reinforcing patch bedded into the membrane and dressed up the drain body, with the membrane lapping onto the drain flange as the product specifies. Do not simply roll over the drain and hope.
- Detail the doorway and threshold. The membrane must terminate at the doorway in a way that stops water tracking under the floor finish into the adjoining room. Most systems call for the membrane to extend beyond the door line and turn up at the threshold, often with a reinforcing strip. Check the product detail and the standard before you cut anything short.
- Apply the first coat. Roll or brush a continuous, even coat across the whole floor, including the areas outside the shower. Do not thin it out to stretch coverage.
- Let the first coat dry. Wait the interval stated on the product, not a guessed timeframe.
- Apply the second coat at right angles. Cross the direction of the first coat to catch misses and build consistent thickness. Pay attention to the edges, corners and around the drain again.
- Add further coats if the system requires. Some systems specify more than two. Do not assume two is enough.
- Inspect before tiling. Check for pinholes, thin spots and uncovered corners. Fix them, then re-coat. A bright torch held at a low angle reveals thin patches that look fine in normal light.
Do not skip the floor waste and doorway details to save time. They are the two places water finds first, and they are the two places a basic roll-over job fails.
For the wider design and installation context, our professional bathroom design and installation guide covers how the membrane stage fits with the rest of the build.
Waterproofing Membrane Drying Time
Drying time depends on the membrane, the number of coats, the room’s temperature and airflow. There is no universal number. The only reliable source is the product’s own instructions, which state the interval between coats and the full cure time before tiling.
Practical rules that hold across most systems:
- Respect the stated interval between coats. Applying the second coat too early traps solvent and weakens the bond.
- Do not speed it up with heaters or fans pointed directly at the membrane. Uneven drying causes uneven cure.
- Keep the area dry and protected. Water, dust and foot traffic during curing are all bad news.
- Wait for full cure before tiling. Tiling over a membrane that is dry to touch but not cured is a common mistake.
Watch out: “dry to touch” is not the same as “ready to tile.” Those are two different milestones in the instructions, and mixing them up is how floors fail under the tiles.
Inspection and flood testing before tiling
Once the final coat is fully cured, inspect before you tile. Walk the floor with a bright torch at a low angle and look for pinholes, thin spots, skips at corners, and any area where the membrane looks lighter than the rest. Pay particular attention to the floor waste, the doorway, and every change of plane.
Where the product instructions and the relevant standard allow it, a flood test can confirm the floor holds water.
What to document before tiling
Documentation matters if you ever sell, renovate again, or need to show compliance. Before tiles go down, keep:
- The membrane product name, batch or code, and the manufacturer’s installation instructions you followed.
- The primer and reinforcing tape used, and where they were applied.
- Photos of the prepared substrate, the detailed junctions, each coat, and the finished membrane before tiling.
- The date of application, the coats applied, and the drying intervals observed.
- Any inspection or flood-test result, and who carried it out.
A simple photo log taken at each stage is a useful record. It takes little time and can help answer questions an inspector or future buyer may ask.
While the membrane cures, it is a good time to plan the floor finish. Our guide to bathroom floor tile pros and cons walks through the trade-offs before you commit.
Common Installation Mistakes and How to Avoid Them
Most membrane failures trace back to a handful of avoidable errors. Here is what we see and how to sidestep each one.
| Mistake | Why It Fails | Fix |
|---|---|---|
| Skipping primer | Poor adhesion, membrane lifts | Prime and let dry fully |
| Damp or dusty substrate | Blistering, trapped moisture | Check moisture, clean and vacuum |
| Thin, patchy coats | Gaps in coverage | Apply even coats at stated thickness |
| No reinforcing tape at junctions | Cracks at corners and wall-floor joins | Tape and embed every junction |
| Second coat applied too early | Weak bond between coats | Wait the full stated interval |
| Tiling before full cure | Membrane damaged under tiles | Confirm cure before tiling |
| Ignoring the drain detail | Leaks at the floor waste | Detail and seal the drain properly |
The biggest one is impatience. Every step has a wait built into it, and cutting those waits short is a common way for a membrane system to fail early.
If you want to protect the work you have just done, our cost-effective bathroom tiling tips show how to tile over a waterproofed floor without undoing the effort.
Book Your Professional Waterproofing Inspection
Waterproofing is the one stage of a bathroom build you cannot easily fix later. Once tiles are down, correcting a membrane problem means pulling the floor apart.
WDC Services offers full bathroom renovation services, with project management from design through to the final tiling and electrical work. You can read what past clients say on our reviews page.
Contact WDC Services for current pricing and to discuss your project before your tiles go down.
Waterproofing failures are expensive and almost always avoidable.
Disclaimer
Please note this advertisement has been AI generated for entertainment and leed generation purposes and In some cases may not reflect the companies exact services and information.
Frequently Asked Questions
Do I need a licensed professional to waterproof my bathroom?
In many cases, yes. Waterproofing is a critical stage that affects the long-term performance of your bathroom. While some homeowners attempt DIY, a licensed waterproofing technician ensures the work meets AS 3740-2021 requirements and manufacturer specifications. Professional installation also provides documentation for warranty and compliance. If you are renovating in Melbourne, check local regulations and consider engaging a specialist to avoid costly failures.
What is the Australian Standard for bathroom waterproofing?
AS 3740-2021 sets out the requirements for waterproofing domestic wet areas, including bathrooms. It specifies where membranes must be applied, such as shower floors, wall junctions, and areas subject to splashing. The standard also covers substrate preparation and membrane performance. Following it helps ensure your bathroom is watertight and compliant. Always confirm that your waterproofing system and installer meet this standard.
How long does a waterproof membrane take to dry before tiling?
Drying time varies by product and conditions. Most liquid membranes require 4 to 6 hours between coats and 24 hours before tiling, but always check the manufacturer’s instructions. Factors like humidity, temperature, and coat thickness affect drying. A common mistake is tiling too soon, which can trap moisture and damage the membrane. Use a moisture meter or follow the product’s guidance to confirm readiness.
Can I apply a waterproof membrane over existing tiles?
Generally, no. Membranes need a clean, stable substrate. Existing tiles are glazed and may not provide adequate adhesion. Removing tiles and preparing the substrate is the correct approach. If you are unsure, consult a professional. Attempting to apply over tiles can lead to membrane failure and water damage. Proper preparation is essential for a lasting waterproof seal.

Disclaimer: Disclaimer, Please note this advertisement has been AI generated for entertainment and leed generation purposes and In some cases may not reflect the companies exact services and information. Prior to engaging the company it is recommended that you seek clarification on some or all points in this advertisement. WDC Services has many 5 star google reviews that can be used as a reliable and true testimony to the quality services proved to its customers over many years. Contact Domenico ( Dom ) Crupi on 0425801005 or email info@wdcservices .com.au for further information.