
Table of Contents
- What Professional Bathroom Design and Installation Actually Involves
- Bathroom Layout Optimisation and Custom Design
- Fixture Selection, Materials and Sustainable Choices
- Bathroom Renovation Project Management: Keeping Trades on Schedule
- What Is the Average Bathroom Renovation Duration?
- Bathroom Waterproofing Requirements AS 3740 and Building Compliance
- Maintenance and Longevity: Protecting Your Investment
- Frequently Asked Questions
Last Updated: September 26, 2026
What Professional Bathroom Design and Installation Actually Involves
Professional bathroom design and installation is the end-to-end process of planning, documenting, building and certifying a wet area, from the first design consultation through to waterproofing compliance and the final tiling inspection. According to HIRI’s quarterly home improvement tracker, 21% of homeowners plan a medium-to-large bathroom renovation in 2026, and bathroom work featured in roughly 46% of all home improvement projects in the most recent quarter, up from 40% a year earlier.
Design Consultation and Concept Development
Every sound project starts with a measured site visit, not a mood board. A designer records existing plumbing locations, wall construction, ceiling height, window positions and floor levels, because those constraints decide what is possible. A concept plan then sets the layout, fixture positions and finishes, and a fixed scope of works is written against it. Skipping this step is the most common cause of mid-project variations.
From Concept to Completion: What Gets Built
The build sequence rarely changes: strip-out, rough-in plumbing and electrical, waterproofing, tiling, fixture installation, then fit-off and certification. Each stage must pass inspection before the next begins, so a compressed early schedule almost always produces delays later. A documented concept keeps trade coordination straightforward because every trade works from the same drawings.
Bathroom Layout Optimisation and Custom Design
Layout optimisation repositions fixtures, storage and circulation within the existing footprint to improve daily function, usually without moving structural walls or the main drain. Flow matters more than floor area: a 2.4 by 1.5 metre bathroom can feel generous if the shower, vanity and toilet are sequenced correctly and the door swing is resolved. Custom design earns its cost here, because a standard plan dropped into an awkward room wastes the space you already own.
Small Bathroom Space-Saving Solutions
- Swap a swinging door for a cavity slider to reclaim floor space
- Use a wall-hung vanity to expose floor and create a sense of depth
- Set a recessed niche into the shower wall instead of adding a shelf
- Choose a corner or back-to-wall toilet to free up circulation
- Run tiles to the ceiling to draw the eye upward
- Add a mirrored cabinet for storage that does not protrude
Measure the door swing before anything else. In compact rooms, the door arc often consumes more usable floor than the vanity, and reversing the hinge or switching to a slider costs far less than reworking a layout after tiling.
Fixture Selection, Materials and Sustainable Choices
Fixture selection is where aesthetics and everyday usability either align or fight each other. These decisions determine how the room performs for the next fifteen to twenty years, so work through them systematically rather than choosing finishes first and fittings later.
Specifying Tapware and Shower Outlets
Choose tapware, mixers and shower roses for water efficiency and serviceability, not just finish, because cartridges and seals fail first. A few practical rules:
- Check the water efficiency label. In most jurisdictions, shower roses and tapware carry a star rating under the national Water Efficiency Labelling and Standards (WELS) scheme. Higher-star outlets reduce flow without a noticeable drop in perceived pressure when matched to an appropriate shower head design.
- Match the cartridge to the warranty. Ceramic disc cartridges generally outlast rubber washers, and a mixer with a replaceable cartridge is far cheaper to service than one with a sealed body.
- Consider thermostatic mixing valves where scalding risk is a concern, particularly in households with young children or older residents. These blend hot and cold to a set maximum temperature and are increasingly specified in new builds.
- Confirm the finish is rated for the environment. Chrome and brushed nickel are durable in most conditions; some powder-coated and painted finishes require more careful cleaning to avoid dulling.
Choosing Tiles and Surface Materials
On the materials side, Badeloft’s 2026 design trend analysis notes a shift toward wellness-focused, sustainable and flexible design, including spa-style showers and improved lighting. In practice, that means specifying low-flow outlets, durable porcelain or vitrified tiles, and ventilation sized to the room’s volume.
Material trade-offs worth weighing:
- Porcelain versus ceramic. Porcelain is denser, less porous and better suited to wet areas and floor traffic; ceramic is lighter and often cheaper but more prone to chipping on floors.
- Large-format versus mosaic. Large-format tiles mean fewer grout lines and easier cleaning, but they demand a flatter substrate and more careful cutting around falls to the waste. Mosaics handle floor falls more gracefully but multiply the grout surface area.
- Natural stone. Attractive but porous and requiring sealing; best reserved for low-splash areas or specified with a reputable impregnating sealer and a maintenance schedule.
- Slip resistance. Floor tiles in wet areas should meet the relevant slip-resistance classification for the application. Ask for the manufacturer’s rating rather than relying on appearance.
Sustainable Choices That Actually Pay Off
Sustainable choices are rarely more expensive than mid-range alternatives; they just need deciding before the order is placed. The most reliable wins:
- Water-efficient fixtures that reduce ongoing consumption without compromising function.
- Durable surfaces that delay replacement, longevity is itself a sustainability measure.
- Local and low-transport materials where available, reducing embodied emissions.
- Efficient ventilation and lighting, including LED downlights and a correctly sized exhaust fan, which protect both the building fabric and running costs.
- Recycled or recyclable content in tiles, vanities and cabinetry where the supplier can substantiate the claim.
Bring your fixture and tile selections to the design consultation, not after the drawings are finalised. Changing a shower rose or tile format late can affect waterproofing details, floor falls and the electrical layout, all of which are expensive to revisit.
A Simple Selection Sequence
A practical order: layout first, then waterproofing-relevant items (shower configuration, floor waste position), then fixtures, then tiles, then joinery and lighting. That order keeps each choice compatible with the last and avoids buying tapware before the shower design is settled.
Bathroom Renovation Project Management: Keeping Trades on Schedule
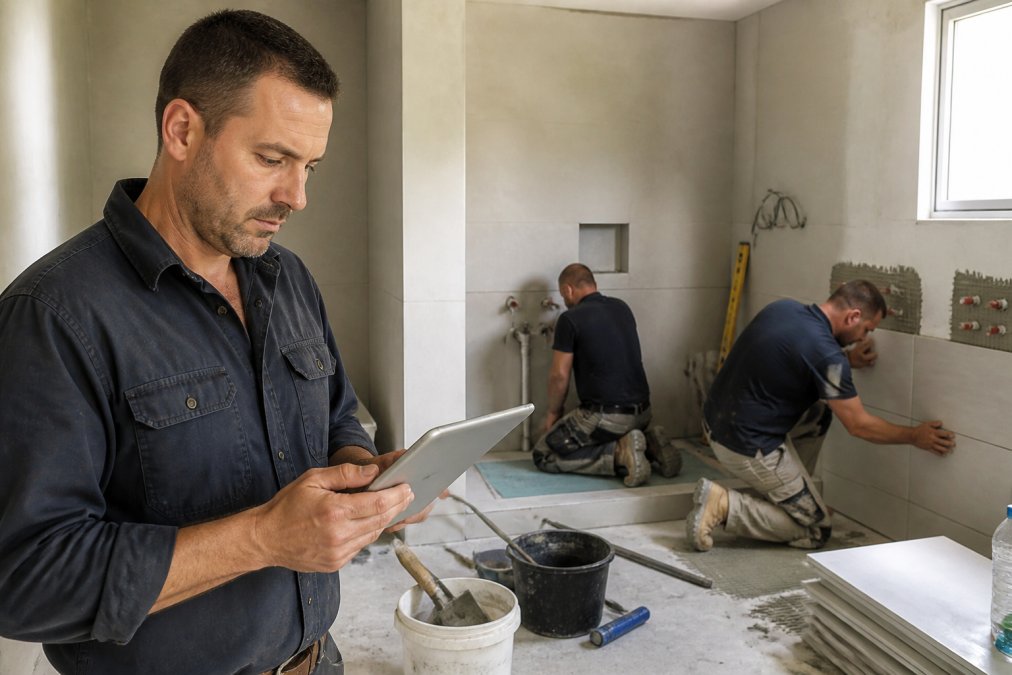
Bathroom renovation project management is the coordination of licensed trades, deliveries and inspections against a single sequenced program so no trade waits on another. The plumber cannot rough-in until strip-out is complete; the waterproofer cannot start until the sheeting is inspected; the tiler cannot begin until the membrane has cured and been signed off. Most delays trace to materials arriving late, a trade booked before the preceding stage was ready, or a variation approved mid-build.
Building the Program
A workable program is built backwards from the inspection milestones, not forwards from the start date:
- Confirm the inspection and certification requirements first. Waterproofing inspections and certificates are the fixed points the rest of the schedule hangs from, because they cannot be compressed.
- Book trades against those fixed points, allowing realistic cure and drying times rather than optimistic ones.
- Schedule deliveries to arrive before the trade that needs them, with a small buffer for backorders.
- Hold a pre-start meeting with the homeowner to confirm selections, access arrangements and any known constraints such as asbestos or hidden water damage.
Coordinating Licensed Trades
Each trade holds its own licence and scope. The plumber, electrician, waterproofer and tiler are typically separately licensed, and whoever coordinates them must ensure each signs off before the next begins. Commonly the builder or project manager holds the overall contract and sub-contracts each trade, keeping one point of accountability for the homeowner.
Key coordination points to watch:
- Rough-in before sheeting. Plumbing and electrical rough-in must be completed and inspected before wall linings go on, or the walls have to be opened again.
- Sheeting before waterproofing. The substrate must be suitable and fixed correctly; a waterproofer who arrives to find an unsuitable substrate will not certify the work.
- Membrane cure before tiling. Cure times are specified by the membrane manufacturer and cannot be shortened without voiding the warranty.
- Tiling before fit-off. Fixtures are installed after tiling to avoid damage and to allow the tiler to work to a clean set-out.
Managing Variations and Changes
Variations are the biggest cause of budget and schedule blowouts on bathroom projects. A disciplined process helps:
- Document every change in writing before the work proceeds, with the cost and time impact stated.
- Group changes where possible so that trades are not called back multiple times.
- Freeze the design before waterproofing. Once the membrane is down, moving a shower head, adding a niche or relocating a waste becomes a strip-out and re-certification exercise.
Approving a variation after waterproofing has been applied is the most expensive mistake in a bathroom build. Moving a shower head or adding a niche at that point means stripping the membrane, re-certifying it and re-tiling, which can add weeks and a significant variation to the contract.
Communication and Handover
A short daily or weekly update, what was done, what is next, and what is needed from the homeowner, prevents most misunderstandings. At handover, collect certificates, warranties and maintenance instructions in one place, and walk the room with the homeowner to confirm finishes and fittings meet the agreed scope.
What Is the Average Bathroom Renovation Duration?
A full bathroom renovation typically takes four to six weeks on site for a standard-sized room, assuming materials are on hand and no structural work is required. Cosmetic updates run shorter; layout changes, new plumbing runs or asbestos removal run longer. The table below shows how each stage contributes.
| Stage | Typical Duration | What Causes Delay |
|---|---|---|
| Strip-out and make safe | 2-3 days | Hidden water damage, asbestos |
| Rough-in plumbing and electrical | 3-5 days | Relocating the main drain |
| Sheeting and waterproofing | 3-4 days | Membrane cure time, inspection booking |
| Tiling and screeding | 5-8 days | Large-format tiles, mosaic features |
| Fixture install and fit-off | 2-3 days | Backordered tapware or vanity |
| Certification and handover | 1-2 days | Defect rectification |
Bathroom Waterproofing Requirements AS 3740 and Building Compliance
Waterproofing is the one stage that cannot be value-engineered. AS 3740, the Australian Standard for waterproofing of domestic wet areas, sets out where membrane must be applied, how far it must extend and how it must be tested before tiling: the entire shower floor and walls to the required height, the full bathroom floor, and upstands at every wall junction.
If a quote does not name who is issuing the waterproofing certificate, treat it as incomplete. The certificate is the document that protects your insurance and your sale.
Maintenance and Longevity: Protecting Your Investment
A correctly built bathroom still needs routine care to reach its expected lifespan. The three habits that matter most: run the exhaust fan during and after every shower, reseal silicone joints at the first sign of cracking, and check under the vanity for slow leaks every few months. Grout is not waterproof; it is a wear surface, and re-grouting before water reaches the membrane is far cheaper than repairing failed waterproofing.
Disclaimer
Frequently Asked Questions
What are the benefits of hiring a professional for bathroom design and installation?
A professional team handles design, waterproofing, plumbing, electrical and tiling under one project manager, so you are not coordinating separate trades. Work is completed to Australian Standards, including AS 3740 waterproofing, and licensed trades sign off their own work. You also get a layout planned around how you actually use the space rather than what fits on a plan.
How does the bathroom renovation process work from design to final handover?
It usually runs in stages: an initial consultation and site measure, concept design and fixture selection, a fixed price quote, then demolition, rough-in plumbing and electrical, waterproofing, tiling, and fit-off of the vanity, shower screen and fixtures. A final inspection and handover closes the project. Bathroom renovation project management keeps each stage sequenced so trades are not waiting on each other, which is the main cause of delays.
What building standards must bathroom renovations meet in Australia?
Waterproofing must comply with AS 3740, which sets out where membranes are required, how far they must extend, and how they are tested. Plumbing and electrical work must be carried out by licensed trades and certified on completion. If the layout changes structural walls or adds a new wet area, a building permit may be required. Your renovator should confirm which approvals apply before demolition begins.
How long does a typical bathroom renovation take?
Most full bathroom renovations run several weeks from demolition to handover. Custom layouts, structural changes or imported fixtures extend it. Waterproofing alone needs curing time before tiling, and that cannot be rushed. Ask for a written schedule with trade dates so you know when the bathroom will be unusable.
Disclaimer: Disclaimer, Please note this advertisement has been AI generated for entertainment and leed generation purposes and In some cases may not reflect the companies exact services and information. Prior to engaging the company it is recommended that you seek clarification on some or all points in this advertisement. WDC Services has many 5 star google reviews that can be used as a reliable and true testimony to the quality services proved to its customers over many years. Contact Domenico ( Dom ) Crupi on 0425801005 or email info@wdcservices .com.au for further information.