
Table of Contents
- Why Your Bathroom Tile Grout Keeps Cracking
- Why Grout Cracks Between Shower Base and Tiles
- How to Diagnose the Root Cause of Cracking
- How to Fix Cracked Bathroom Grout
- Can You Grout Over Cracked Grout
- Signs of Water Damage Behind Bathroom Tiles
- When to Call a Professional Tiler
- Preventing Future Grout Cracks
- Frequently Asked Questions
Last Updated: October 21, 2026
Why Your Bathroom Tile Grout Keeps Cracking
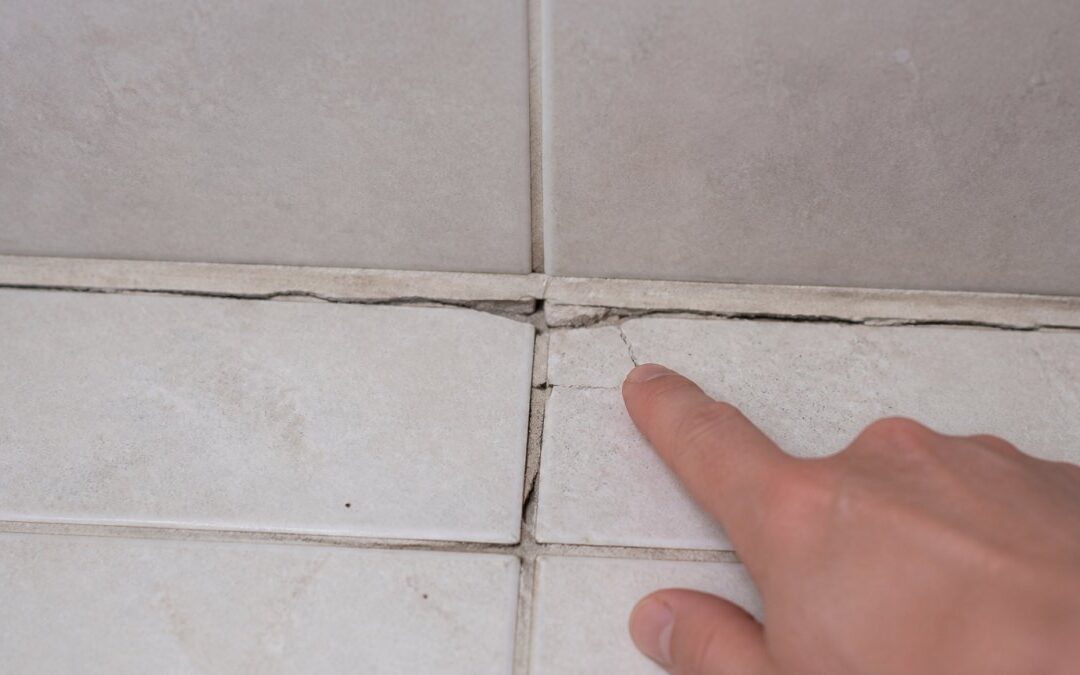
Cracked bathroom tile grout is one of the most frustrating problems homeowners face during renovations or after settling into a newly tiled space. You look at your shower wall or bathroom floor, and there it is: fine lines running through the grout, or worse, chunks of grout missing entirely.
Cracked bathroom tile grout is almost always a symptom of something deeper: movement in the subfloor, poor tile bonding, moisture damage, or structural settling. Until you address the root cause, the cracks will return.
This guide walks you through the most common reasons why bathroom tile grout keeps cracking, how to diagnose which problem you’re facing, and the right fix for each situation.
Movement in the Subfloor and Structural Settling
The single biggest cause of recurring grout cracks is movement beneath the tiles. When your subfloor flexes, shifts, or settles unevenly, the tiles above move with it. Grout is rigid and brittle, it cannot flex. So it cracks.
Subfloor movement happens for several reasons. New homes settle over the first few years as the foundation adjusts. Older homes can develop movement from wood rot, inadequate support beams, or moisture damage to the joists. In bathrooms, the problem is often worse because bathrooms are typically built over areas with less structural support than living rooms or kitchens.
You’ll notice this pattern: cracks appear, you repair them, and within weeks or months they’re back in the same place. That’s a clear sign the subfloor is moving, not that the grout is defective.
Poor Tile Bonding and Installation
Tiles need a strong bond to the substrate beneath them. This bond comes from thinset mortar, the adhesive spread under each tile during installation. If the thinset is applied too thin, mixed incorrectly, or applied over a dirty or uneven surface, the tiles won’t bond properly.
When tiles don’t bond well, they rock slightly under foot traffic or pressure. This movement causes the grout between them to crack. Poor installation is especially common in bathrooms, where moisture can weaken an already weak bond over time.
A common mistake is assuming all grout failures are the same. They’re not. Grout that cracks in a grid pattern (following every joint) often points to poor bonding. Grout that cracks sporadically or in one area suggests localized movement or moisture.
Moisture and Water Damage Behind Tiles
Water is grout’s enemy. When moisture gets behind bathroom tiles, it can damage the substrate, weaken the tile adhesive, and cause the grout itself to break down. In wet areas like shower floors and walls, this is especially critical.
Water damage often happens slowly. You might not see it for months or even years. By the time cracks appear, the damage is already significant. Bathroom tile grout cracking in a shower is frequently a sign that water has penetrated behind the tiles and is doing damage you can’t see.
The fix here isn’t just regrouting. You need to address the waterproofing. If water continues to seep behind the tiles, new grout will fail just like the old grout did.
Why Grout Cracks Between Shower Base and Tiles
The joint where shower base meets tile wall is one of the most vulnerable spots in a bathroom. This is where two different materials meet: the rigid tile and the more flexible shower base or pan. This junction experiences constant stress from water pressure, temperature changes, and movement.
Standard grout is not the right product here. Grout is rigid. When the shower base flexes slightly (as it should), rigid grout cannot move with it. It cracks. The fix is to use flexible sealant, typically silicone caulk, instead of grout at this change of plane.
Many homeowners and even some installers make the mistake of using grout at this junction. It will crack. Every time. The solution is to remove the grout, clean out the joint thoroughly, and apply flexible silicone caulk instead.
How to Diagnose the Root Cause of Cracking
Before you fix anything, you need to know what’s actually wrong. Diagnosing the cause correctly saves time and money. The wrong repair won’t last.
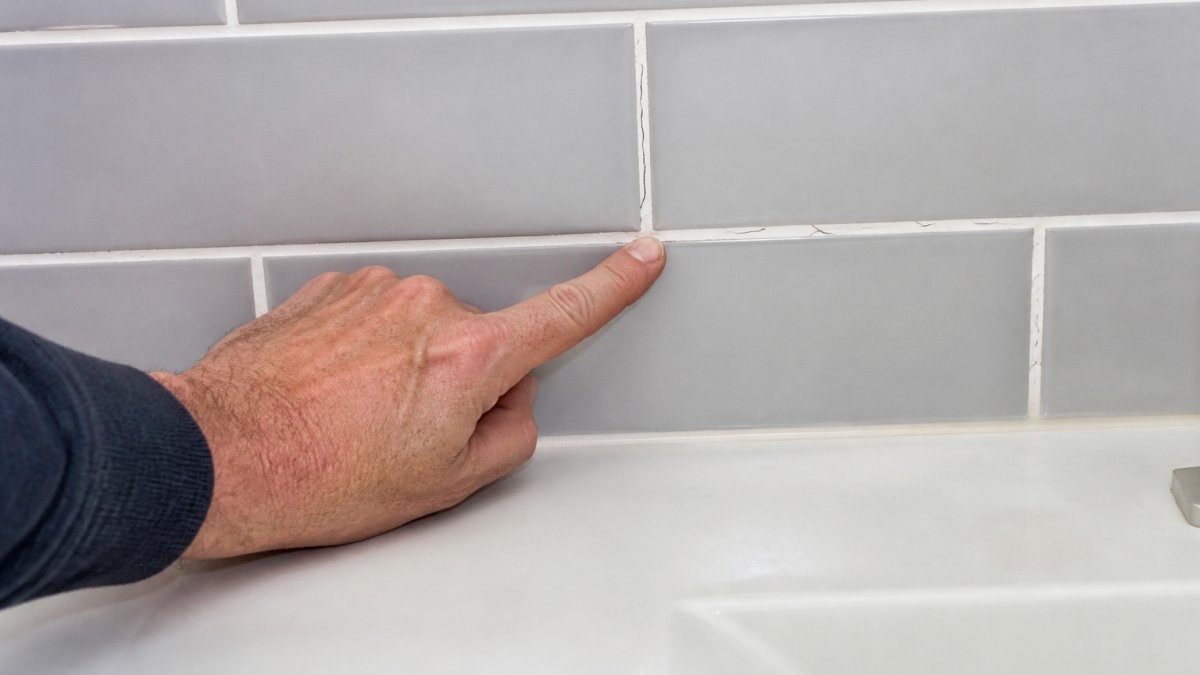
Assess Tile Movement and Adhesive Bond
Start by testing the tiles themselves. Press firmly on tiles near the cracks. Do they rock or flex? If they do, the bond is weak or the subfloor is moving. A properly bonded tile should feel solid and immobile.
Walk across the bathroom floor near the cracked grout. Do you feel any flex or bounce? This suggests subfloor movement. If the floor feels firm and solid but tiles still rock, the problem is likely poor tile bonding.
Look at the crack pattern. Does it follow every grout line in a grid? That suggests widespread bonding issues or subfloor movement across the whole area. Do cracks appear only in one corner or along one wall? That points to localized movement or settling.
Check for Water Damage and Moisture
Look behind and below the cracked grout. Is there discoloration, soft substrate, or mold? These are signs of water damage. In shower areas, check whether water runs behind the tiles when the shower is in use. You can test this by running water over the tile and watching the grout lines carefully.
Tap the tile with a small hammer or the handle of a screwdriver. A solid tile will produce a crisp, hollow sound. A tile with water damage or poor bonding often sounds dull or flat. This simple test can reveal hidden moisture problems.
In bathrooms, moisture problems are especially common behind shower walls and under floor tiles. These areas are hard to see, but they’re the most likely places for water to accumulate.
How to Fix Cracked Bathroom Grout
Once you’ve diagnosed the problem, the repair approach changes. There’s no one-size-fits-all fix for bathroom tile grout cracking.
Preparation and Safety
Before you start, ensure the area is clean and dry. Turn off water to the bathroom if you’re working on a shower. Wear safety glasses and a dust mask, grinding out old grout creates fine particles.
Assess whether the problem is isolated or widespread. A few cracks in one corner might be a simple regrouting job. Cracks throughout the bathroom suggest a deeper structural or installation issue that regrouting alone won’t fix.
If you suspect subfloor movement or water damage, consider calling a professional tiler or builder before you attempt repairs. We can assess the underlying cause and recommend the right approach, whether that’s structural work, waterproofing, or simple regrouting.
Remove Old Grout and Clean Joints
Use a grout saw or oscillating multi-tool with a grout blade to cut out the old grout. Work carefully to avoid chipping the tiles. Remove grout to a depth of about half the tile thickness, typically 3-5 millimetres.
Once the old grout is out, vacuum the joints thoroughly to remove all dust and debris. Use a damp cloth to clean the joint one more time, then allow it to dry completely. Any dust or moisture left behind will weaken the new grout.
Apply New Grout or Flexible Sealant
For most bathroom tile grout, use a high-quality epoxy or urethane grout. These are more water-resistant than standard cement grout. Mix the grout according to the manufacturer’s instructions, consistency matters. It should be like peanut butter: thick enough to stay in the joint but spreadable.
Use a grout float to press the new grout firmly into the joints. Work at a 45-degree angle to avoid pulling grout back out. Allow it to cure according to the manufacturer’s instructions before exposing it to water.
For the joint between shower base and tile, use flexible silicone caulk instead. This is critical. Caulk moves with the materials as they expand and contract, so it stays intact.
Can You Grout Over Cracked Grout
No. Grouting over existing cracked grout is a temporary fix that will fail. New grout will not bond properly to old, cracked grout. The new grout will crack again, often within weeks.
The only proper fix is to remove the old grout completely. Yes, it’s more work. But it’s the only way to get a repair that lasts.
Signs of Water Damage Behind Bathroom Tiles
Water damage behind bathroom tiles is often invisible until it’s severe. Watch for these warning signs:
- Grout that is soft, crumbly, or discoloured
- Tiles that are loose or rock when pressed
- Mold or mildew appearing frequently despite cleaning
- A musty smell in the bathroom, especially near the shower
- Soft spots in the floor near the bathroom
- Grout cracks that appear suddenly or spread rapidly
- Discoloration on the substrate visible through grout joints
If you notice any of these, water is likely getting behind the tiles. This requires more than regrouting. The waterproofing needs to be addressed, and the substrate may need to be dried and treated.
When to Call a Professional Tiler
Some grout cracks are DIY-friendly. Others require professional help. Call a professional if:
- Cracks reappear within weeks of repair
- The subfloor feels soft or bouncy
- You suspect water damage behind the tiles
- Grout is cracking across a large area
- The bathroom floor or walls show visible movement or settling
- You’re unsure whether the problem is grout, bonding, or structural
WDC Services works with homeowners to diagnose these issues correctly. We can identify whether the problem is simple regrouting or whether structural work, waterproofing, or re-tiling is needed. Getting the diagnosis right the first time saves money and frustration.
Preventing Future Grout Cracks
Once you’ve repaired the grout, take steps to prevent new cracks:
- Ensure proper ventilation in the bathroom to reduce moisture
- Fix any leaks promptly, water damage accelerates grout failure
- Use flexible sealant at change-of-plane joints (where tile meets shower base)
- Avoid acidic or abrasive cleaners that weaken grout over time
- Seal grout with a quality penetrating sealer to reduce moisture absorption
- In wet areas, consider epoxy or urethane grout instead of cement grout, they’re more water-resistant
The key to long-lasting grout is addressing the underlying cause of cracking, not just patching the symptom. If your bathroom tile grout keeps cracking, the problem is almost never the grout itself.
If your bathroom tile grout keeps cracking and you’ve tried regrouting without success, the issue runs deeper. Water damage, poor bonding, or structural movement requires professional assessment. At WDC Services, we specialise in bathroom renovations and can identify exactly what’s causing the problem, from waterproofing and tile bonding through to subfloor assessment.
Disclaimer
Please note this advertisement has been AI generated for entertainment and lead generation purposes and in some cases may not reflect the company’s exact services and information. Prior to engaging the company it is recommended that you seek clarification on some or all points in this advertisement.
Frequently Asked Questions
How do I know if my bathroom tile grout cracks are caused by movement or moisture?
Movement cracks typically run diagonally across grout lines and follow a pattern, whilst moisture-related cracks appear random and may be accompanied by discoloration, mould, or soft grout. Press gently on surrounding tiles: if they move, subfloor deflection is likely. Check behind tiles for dampness by listening for hollow sounds when tapping, this indicates poor bonding or water ingress. If you see staining or smell musty odours, moisture is the culprit.
Can you grout over cracked grout without removing the old grout first?
Grouting over cracked grout is not recommended because new grout will not bond properly to old, damaged grout. The new grout will crack again in the same spots. Proper repair requires removing the old grout entirely using a grout saw or oscillating tool, cleaning the joints thoroughly, and applying fresh grout. This ensures durability and prevents recurring cracks.
What are the signs of water damage behind bathroom tiles that cause grout to crack?
Signs include soft or crumbling grout, visible mould or mildew on tile surfaces or grout lines, discoloured or stained grout, loose tiles, a musty smell in the bathroom, and water pooling on the floor. If you notice these, water is penetrating behind the tiles and weakening the adhesive bond. This requires professional waterproofing assessment to prevent further damage and repeated cracking.
Should I use grout or silicone caulk between my shower base and tiles?
Use flexible silicone caulk at the change of plane where the shower base meets the wall tiles. Grout is rigid and cannot flex with the movement that occurs in this high-stress area, so it will crack. Silicone caulk accommodates expansion and contraction from moisture and temperature changes, maintaining a watertight seal and preventing water from entering behind tiles.
Disclaimer: Disclaimer, Please note this advertisement has been AI generated for entertainment and leed generation purposes and In some cases may not reflect the companies exact services and information. Prior to engaging the company it is recommended that you seek clarification on some or all points in this advertisement. WDC Services has many 5 star google reviews that can be used as a reliable and true testimony to the quality services proved to its customers over many years. Contact Domenico ( Dom ) Crupi on 0425801005 or email info@wdcservices .com.au for further information.