
Table of Contents
- The Bathroom Renovation Process, Step by Step
- Your Bathroom Renovation Timeline: What Each Phase Takes
- Bathroom Waterproofing Standards AS 3740: What You Need to Know
- Bathroom Renovation Cost Breakdown: Where the Money Goes
- Living Through the Work: Dust, Sanitation, and Daily Life
- Common Bathroom Renovation Mistakes (and How to Avoid Them)
- Post-Renovation Maintenance: Protecting Your Investment
- Frequently Asked Questions
Last Updated: September 2, 2026
The Bathroom Renovation Process, Step by Step
A bathroom renovation is one of the highest-return home improvements you can make, yet it’s also one of the most disruptive. According to Housing Industry Association data via ArchiPro, the average spend on a bathroom renovation now sits at $26,000, up from $21,000 previously, driven by rising labour costs and material shortages. At WDC Services, we’ve managed enough of these projects to know that homeowners who understand what’s coming before the first tile is lifted sail through them smoothly.
This guide walks you through every phase of a bathroom renovation, from design to final fit-off, including dust containment, temporary sanitation, permit compliance, and post-renovation maintenance.
Step 1: Design, Planning, and Permits
The design and planning phase determines whether the entire project succeeds or fails.
“The most common mistake, and the most expensive, is starting the build before the design is finalised and properly documented. Renovations are a puzzle of millimetres, with bathrooms even more so.”
— Erin Fairmaid, Interior Architect at HeHe Design (Domain, 2026)
Finalise your layout, select fixtures, vanity, tapware, tiles, and drainage positions, and confirm material lead times before work begins. Some imported tiles and freestanding baths take six to eight weeks to arrive; ordering late means your tradesperson sits idle.
Most structural changes, plumbing relocations, and electrical work require council approval or licensed contractor sign-off under the National Construction Code. Check your local council’s requirements before committing to a layout that shifts drainage.
Permit and Compliance Checklist:
- Confirm whether your scope triggers a building permit (structural changes, new drainage runs)
- Engage a licensed plumber for any drainage or rough-in work
- Engage a licensed electrician for all electrical work including exhaust fans and heated towel rails
- Verify waterproofing will be inspected before tiling proceeds
- Confirm ventilation requirements under AS 1668 for exhaust fan sizing
Step 2: Demolition and Site Preparation
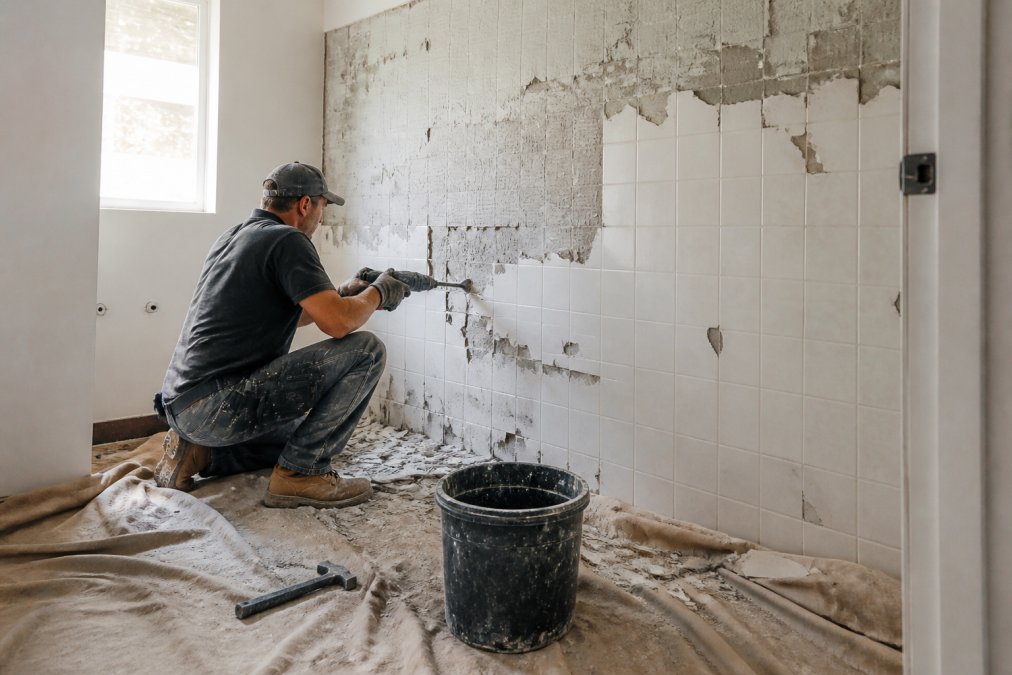
Demolition is faster than most homeowners expect and messier than any anticipate.
A full gut renovation strips the room back to framing and subfloor: tiles, plasterboard, old fixtures, vanity, bath, and toilet all come out. Protect the rest of your home with dust sheets on floors and plastic sheeting sealing doorways. Any shared plumbing stacks need to stay live for the rest of the house.
Subfloor condition is revealed here, and this is where budget surprises live. Rotted or water-damaged subfloor timber must be replaced before anything else proceeds; skipping it undermines structural integrity and waterproofing.
Step 3: Plumbing and Electrical Rough-In
Rough-in plumbing sets positions for shower waste, bath drain, toilet, and vanity supply lines inside the wall and floor structure. Electrical rough-in runs cabling for exhaust ventilation, lighting, heated towel rails, and underfloor heating. Both must be completed and inspected before walls are lined.
Layout changes after rough-in become expensive. Moving a toilet waste point means cutting into the slab or repositioning drainage. Confirm your layout is locked before rough-in begins.
Step 4: Framing, Waterproofing, and Wall Lining
Once rough-in is signed off, framing adjustments are made and moisture-resistant plasterboard or fibre-cement sheeting is fixed to walls and ceiling. Standard plasterboard is not appropriate for bathroom walls.
Waterproofing is applied to wet area surfaces before tiling. This step has its own Australian Standard and must be inspected by a building inspector in most states before tiling proceeds. Do not allow a contractor to tile over uninspected waterproofing.
Step 5: Tiling, Flooring, and Fit-Off
Tiling transforms the space visually and takes longer than most expect. Large-format tiles require careful substrate preparation and precise levelling. Epoxy grouts offer superior resistance to moisture and staining in wet areas.
Fit-off is the final trade phase: vanity, toilet, tapware, shower screen, towel rails, mirrors, and lighting are installed. A well-sequenced project books these tradespeople in advance; a poorly managed one has them unavailable for weeks.
Your Bathroom Renovation Timeline: What Each Phase Takes
A bathroom renovation timeline runs from three to five weeks for a standard project once construction begins, but the full process, including design, material ordering, and permit approval, typically spans eight to twelve weeks from first conversation to finished bathroom.
| Phase | Typical Duration | Notes |
|---|---|---|
| Design and planning | 2-4 weeks | Longer if custom items or council permits required |
| Material ordering | 2-8 weeks | Imported tiles and freestanding baths take longest |
| Demolition | 1-3 days | Longer for full gut renovations |
| Rough-in plumbing and electrical | 3-5 days | Includes inspection hold points |
| Waterproofing and lining | 3-5 days | Includes mandatory curing time |
| Tiling | 3-7 days | Depends on tile size and complexity |
| Fit-off and final installation | 2-3 days | Requires all fixtures on site |
| Inspections and defect rectification | 1-3 days | Allow buffer for inspector availability |
According to Renovation Master’s 2025 project timeline data, most standard bathroom renovations take between three and five weeks from demolition to final installation, assuming no major structural changes or unforeseen delays.
The most common timeline blowout is caused by fixtures arriving late. Confirm delivery dates for every item before demolition begins. A shower screen on back-order can stall fit-off by three weeks.
Bathroom Waterproofing Standards AS 3740: What You Need to Know
AS 3740 is the Australian Standard governing waterproofing of domestic wet areas. It specifies minimum membrane application heights, product types, and inspection requirements for bathrooms, ensuites, and laundries.
Under AS 3740, wet area waterproofing is mandatory. Key requirements include:
- Shower floors and walls must be waterproofed to a minimum height of 1,800 mm, or to full wall height where tiles don’t extend to the ceiling
- Floor areas outside the shower recess must be waterproofed where subject to water splash
- Waterproofing membranes must be applied by a licensed waterproofer and cure fully before tiling
- Work must be inspected before tiles are applied
Waterproofing failures are the leading cause of long-term bathroom damage, including structural timber decay, mould growth, and costly remediation.
Ask your contractor to show you the waterproofing inspection certificate before tiling begins. If they can’t produce it, stop the job.
Bathroom Renovation Cost Breakdown: Where the Money Goes
The average bathroom renovation cost in Australia sits at $26,000, with the range running from approximately $5,000 for a cosmetic refresh to $40,000 or more for a full luxury renovation, according to ArchiPro’s 2024 renovation cost guide.
“It’s a very tricky balance between what you can afford and what you really want. Generally there will be compromises to be made to get the best solution.”
— Kylie Mitchell, Spokesperson at Building Designers Association of Australia (CHOICE, 2023)
Typical cost allocation across a mid-range bathroom renovation:
| Category | Approximate Share of Budget |
|---|---|
| Labour (all trades) | 40-50% |
| Tiles and waterproofing | 10-15% |
| Vanity, toilet, and tapware | 15-20% |
| Shower screen and bath | 10-15% |
| Electrical and lighting | 8-12% |
| Permits and inspections | 2-5% |
Labour represents the largest single cost and is most vulnerable to scope creep. Every design change after rough-in carries a labour cost. Budget allocation decisions made during planning directly determine whether you finish on budget.
Bathroom renovations typically return 50-75% of investment in property value, making them among the highest-ROI improvements available to homeowners, according to Blue Leaf Bathware & Tiles renovation ROI data.
For current pricing on a WDC Services renovation, contact the team directly for a project-specific quote, as costs depend on scope, materials, and site conditions.
Living Through the Work: Dust, Sanitation, and Daily Life
Most renovation guides focus on what happens inside the bathroom. This section covers what happens to the rest of your home, because that’s what actually makes the experience difficult.
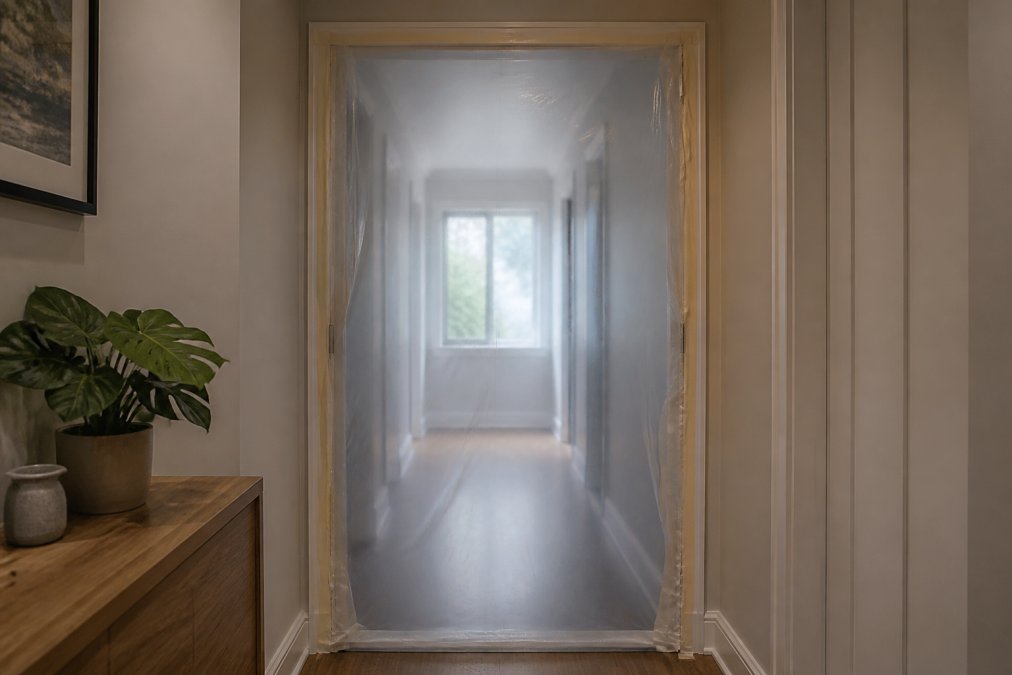
Dust containment is non-negotiable. Demolition of tiles and plasterboard generates fine silica dust that travels through an entire house if the site is not sealed. Expect your contractor to seal the doorway with heavy plastic sheeting before demolition begins.
Temporary sanitation is the issue homeowners underestimate most. Your bathroom will be completely unusable for three to five weeks. Practical solutions include:
- Confirming access to another bathroom in the home
- Arranging short-term access with a neighbour or family member for the most disruptive phases
- Booking temporary accommodation for the demolition and rough-in week if only one bathroom exists
- Renting a portable toilet for external placement during the first week
Daily life management:
- Move toiletries, medicines, and personal items out before demolition day
- Protect adjacent flooring with hardboard sheets along the tradesperson’s access path
- Keep children and pets away from the work area
- Confirm with your contractor which days tradespeople will be on site
Living through a bathroom renovation is genuinely disruptive. Homeowners who manage it best treat it as a temporary relocation exercise. Plan your sanitation and access arrangements before demolition day.
Common Bathroom Renovation Mistakes (and How to Avoid Them)
The biggest mistakes in bathroom renovation are about sequencing, documentation, and the gap between showroom appeal and wet-area performance.
Mistake 1: Starting construction before the design is locked.
Changes made after rough-in are expensive. Changes made after tiling are very expensive. Finalise every fixture, fitting, and tile selection before demolition begins.
Mistake 2: Prioritising aesthetics over function.
Removing a bath for a double shower may look appealing, but it can deter families and reduce resale appeal, according to realestate.com.au’s 2026 renovation report. Hidden cistern toilets look sleek but make repairs difficult. High-maintenance natural stone requires sealing schedules most homeowners don’t follow.
Mistake 3: Ignoring ventilation.
Poor ventilation causes mould, paint failure, and moisture damage to wall linings. Exhaust fans must be sized correctly for room volume and ducted to the exterior, not into a roof cavity.
Mistake 4: Choosing a contractor on price alone.
The cheapest quote rarely accounts for full scope. Unlicensed waterproofing, uninspected rough-in work, and substandard grout are invisible at handover and expensive to fix later.
Mistake 5: Not building a contingency.
A 10-15% contingency on your total budget is standard. Subfloor damage, concealed plumbing issues, and material substitutions are common discoveries that carry real costs.
Post-Renovation Maintenance: Protecting Your Investment
A well-executed bathroom renovation should last fifteen to twenty years with proper maintenance. Most failures within the first five years trace back to neglected grout, inadequate ventilation, or deferred silicone replacement.
Grout and silicone:
Inspect grout lines and silicone joints annually. Silicone around the shower base, bath, and vanity typically needs replacement every five to seven years. Cracked or missing silicone allows water ingress behind tiles, which precedes waterproofing failure.
Exhaust ventilation:
Run the exhaust fan during every shower and for ten minutes afterwards. Clean the fan grille every six months. A blocked fan is functionally no fan at all.
Tapware and fixtures:
Rinse tapware and showerheads with clean water after use in hard-water areas. Descale showerheads every six to twelve months. Check under-vanity connections annually for slow weeps.
Tiles and surfaces:
Epoxy grout requires no sealing. Cement-based grout in wet areas should be sealed on installation and resealed every one to two years. Natural stone requires specific stone sealers applied according to the supplier’s schedule.
Research from Allianz (2026) found that 40% of homeowners take a “set and forget” approach to maintenance, with 39% prioritising visual appeal over routine upkeep. This pattern turns a $26,000 renovation into a $10,000 remediation job within a decade.
Frequently Asked Questions
In what order should you complete bathroom renovation tasks?
The correct sequence is: design and permits first, then demolition and site preparation, followed by plumbing and electrical rough-in, framing, waterproofing, wall lining, tiling, and finally fit-off (fixtures, vanity, towel rails, and accessories). Skipping or reordering steps, particularly waterproofing before tiling, violates AS 3740 and can cause serious moisture damage. A full bathroom renovation typically runs 3 to 5 weeks once construction begins, assuming no structural surprises.
How long does a typical bathroom renovation take?
Most standard bathroom renovations take 3 to 5 weeks from demolition to final installation, according to Renovation Master (2025). However, the full process including design, permits, and material ordering commonly spans 6 to 9 weeks. Material lead times are one of the biggest causes of delay, ordering fixtures, tiles, and vanities before work starts keeps the project moving. Structural changes or unforeseen plumbing issues can add further time.
What are the most common mistakes to avoid during a bathroom renovation?
The costliest mistake is starting construction before the design is fully documented. As interior architect Erin Fairmaid notes, bathrooms are ‘a puzzle of millimetres’, decisions left until mid-build cause expensive rework. Other frequent errors include skipping or underspecifying waterproofing, choosing high-maintenance materials without a maintenance plan, removing the bathtub (which can reduce resale appeal for families), and failing to budget a contingency of at least 10-15% for hidden plumbing or structural issues.
What are the mandatory waterproofing requirements for bathrooms?
Waterproofing in wet areas must comply with AS 3740-2021 (Waterproofing of Domestic Wet Areas), which is adopted under the National Construction Code (NCC). The standard specifies which surfaces must be waterproofed, membrane types, and application methods. Waterproofing must be inspected and approved by your certifier before tiling begins. Using a licensed waterproofer and retaining inspection records protects you from defect liability and is required for building permit sign-off.
Bathroom renovations are complex, multi-trade projects that reward thorough planning and punish improvisation. WDC Services provides full project management for bathroom renovations, handling design, waterproofing, tiling, electrical, and carpentry under a single point of accountability. Contact WDC Services to discuss your project and receive a detailed, scope-specific quote.
Disclaimer: Disclaimer, Please note this advertisement has been AI generated for entertainment and leed generation purposes and In some cases may not reflect the companies exact services and information. Prior to engaging the company it is recommended that you seek clarification on some or all points in this advertisement. WDC Services has many 5 star google reviews that can be used as a reliable and true testimony to the quality services proved to its customers over many years. Contact Domenico ( Dom ) Crupi on 0425801005 or email info@wdcservices .com.au for further information.