
Table of Contents
- Step 1: Assess Your Current Space and Take Accurate Measurements
- Step 2: Define Your Budget and Cost Expectations
- Step 3: Identify User Needs and Accessibility Requirements
- Step 4: Plan Your Bathroom Layout Mistakes to Avoid
- Step 5: Address Plumbing, Electrical, and Waterproofing Standards
- Step 6: Select Fixtures, Finishes, and Storage Solutions
- Step 7: Create a Realistic Bathroom Renovation Timeline
- Final Checks: Building Codes and Professional Design Review
- Frequently Asked Questions
Last Updated: October 4, 2026
Step 1: Assess Your Current Space and Take Accurate Measurements
Planning a bathroom renovation layout starts with accurate measurements. Measure floor dimensions, ceiling height at multiple points, and document everything immediately, don’t rely on memory.
Document plumbing locations (water supply, soil pipe, drainage) and electrical outlets on a sketch. Take photos from different angles.
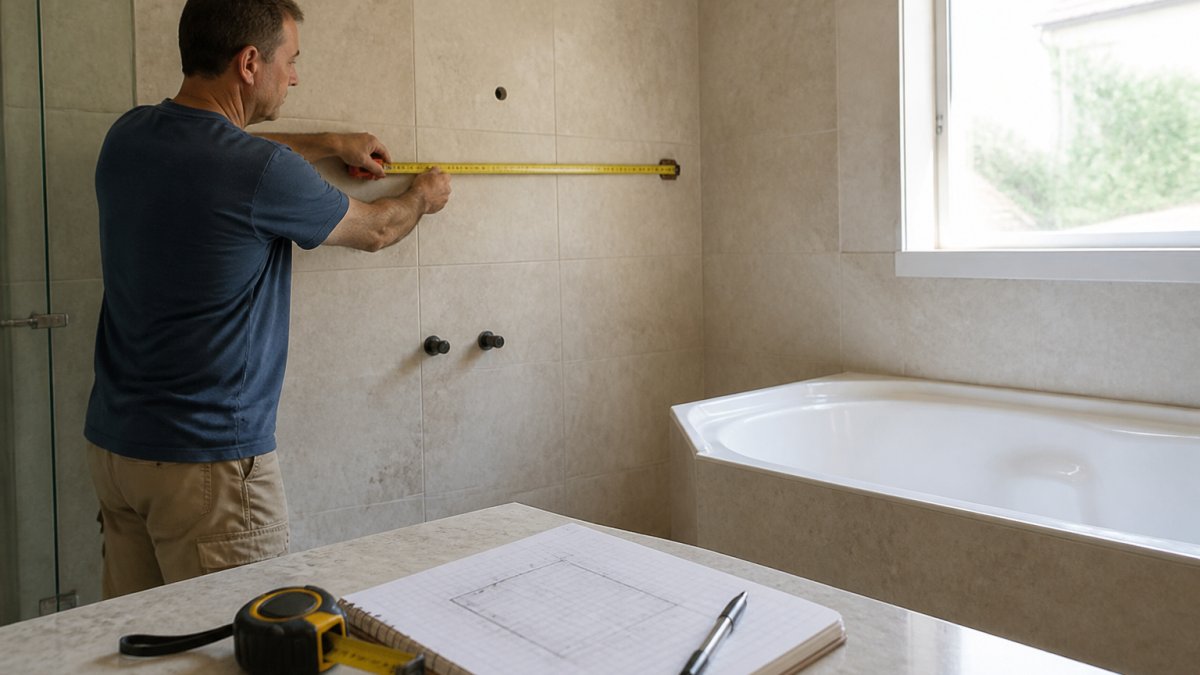
Sketch your measurements on paper as you go. Include door swings, window locations, and any fixed obstacles. This rough sketch becomes your planning reference.
Small errors compound into expensive mistakes. Document fixture condition, whether pipes are accessible and if electrical wiring is adequate, as these details shape budget and timeline.
Step 2: Define Your Budget and Cost Expectations
Your budget drives every decision that follows. Be honest about what you can afford before you design anything.
Costs vary widely: fixture replacement differs from full reconfiguration. Layout changes cost more because they involve moving plumbing and electrical infrastructure.
Prioritise what matters: luxury finishes versus durability, smart technology versus simple fixtures. These choices directly affect overall spend.
Set your budget early and stick to it. Design within your means rather than designing first and hoping to find the money.
Build in a 10-15% contingency buffer for unexpected issues that emerge during demolition.
Get quotes from multiple sources and compare what’s included, design, permits, and scope, to prevent budget shock.
Step 3: Identify User Needs and Accessibility Requirements
Who uses this bathroom? Their needs shape everything about the layout. A primary bathroom for an elderly person requires different planning than a guest bathroom for visitors.
Consider daily routines: wheelchair access, mobility aids, children’s fixture heights. These determine spatial planning.
Accessibility features benefit everyone: lower vanities aid shorter users, grab bars prevent falls, wider doorways ease cleaning, non-slip flooring protects all users.
Plan storage before layout design. Running out of space after renovation is frustrating and expensive to fix.
Plan ventilation: windows alone are often insufficient. Proper ventilation prevents mould and moisture damage.
Step 4: Plan Your Bathroom Layout Mistakes to Avoid
Common layout mistakes waste space and create dysfunction. Understanding these pitfalls, and the specific measurements that prevent them, helps you design a bathroom that actually works.
Fixture Clearance and Accessibility Distances
Fixture placement follows regulatory clearance rules. Toilets require minimum 600 mm clear space in front (from pan edge to nearest obstruction). Side clearance should be 150 mm each side, minimum 100 mm in tight spaces.
Vanities need 150 mm knee clearance underneath (standard height 800-850 mm). Pedestal or full-base vanities prevent sitting, plan accordingly.
Shower enclosures need 750 mm clear floor space in front for door operation. Freestanding baths need 300 mm clearance on all sides. Doorways should be 775 mm wide (clear opening) for comfortable passage and future accessibility.
Traffic Flow and Spatial Awareness
Design natural traffic flow. Hide the toilet from the doorway for privacy. Position wet areas away from the entry door to contain water splash and humidity.
Common Placement Errors
Position vanity and toilet perpendicular or offset. Choose vanity width based on actual space, not aesthetics. Plan door swings carefully, pocket or sliding doors work better in tight spaces.
Wet Area Water Management
Plan water containment with fully enclosed showers, wet rooms, or adequate screens. Bathroom floors must slope toward the drain (1:100 gradient, or 10 mm per 1000 mm). Proper slope prevents pooling and mould, it’s a building code requirement.
Fixture placement errors cannot be fixed without expensive rework after construction. Measure twice, plan carefully, and verify clearances before you commit to a layout.
Layout Verification Checklist
Verify: 600 mm toilet clearance, 150 mm vanity knee clearance, adequate shower/bath clearance, 775 mm doorway opening, natural traffic flow, wet area positioned to contain splash, floor slope toward drain, no fixture blocking access. A well-planned layout feels spacious; a poorly planned one feels cramped daily.
Step 5: Address Plumbing, Electrical, and Waterproofing Standards
These technical elements aren’t optional. They’re regulated for safety, durability, and legal compliance. Understanding what’s required during planning prevents costly rework and failed inspections.
Waterproofing Compliance and Wet Area Protection
Your bathroom must comply with AS 3740 (Waterproofing of Wet Areas in Buildings). Waterproofing involves a complete system: membrane, sealed joints, protective barriers, and substrate preparation. The standard defines three zones:
Zone A (Wet Areas): Showers, baths, direct spray areas. Full waterproofing required, walls to 2000 mm, floors, all penetrations. Membranes must be continuous and sealed. Grout must be sealed with hydrophobic sealant.
Zone B (Splash Zones): Vanity areas, occasional splash. Waterproofing to 1500 mm, sealed joints. Tile and grout acceptable if properly sealed.
Zone C (Dry Areas): Remainder of bathroom. Standard paint acceptable; moisture-resistant materials recommended.
Identify which surfaces fall into each zone during planning. Floor waterproofing is critical: membranes must extend 150 mm up walls, and penetrations must be sealed with waterproof collars.
Seal all corners and joints with flexible waterproof sealant, not grout. Plan these details during design.
Ventilation and Humidity Control
Mechanical ventilation must extract humid air directly outside, not into roof cavities. A standard bathroom (5-8 m²) needs a fan rated for 15-20 L/s. Larger bathrooms need proportionally larger fans.
Position exhaust fans close to showers/baths to capture moisture at source. Use rigid or semi-rigid ductwork, sloped downward and insulated.
Drainage and Slope
Bathroom floors must slope toward the drain (1:100 gradient). Drain pipes must slope downward (minimum 1:40 gradient) to prevent backflow. Consult a licensed plumber if relocating drains.
Electrical Safety and Placement
Electrical wiring must meet AS/NZS 3000. Outlets within 1.5 m of water sources need RCD protection. Lighting circuits should be separate from power circuits.
Plumbing Infrastructure and Relocation Costs
Moving water supply lines and drainage pipes is significantly more expensive than designing around existing infrastructure. During planning, identify where your current pipes are located.
If you must relocate pipes, get a licensed plumber involved early. They can advise on feasibility, cost implications, and the best routing.
Water supply lines should be accessible for future maintenance. Avoid burying them in walls if possible. If they must be in walls, ensure they’re clearly marked and documented for future reference.
Hot water supply to the bathroom should be adequately sized.
Before finalising your layout, have a licensed plumber review your design. They can confirm that plumbing relocation is feasible, identify potential issues, and provide accurate cost estimates.
Step 6: Select Fixtures, Finishes, and Storage Solutions
Fixture selection affects both function and aesthetics. Choose pieces that work for your space and your budget.
Consider fixture sizes carefully. A large spa bath looks beautiful but needs adequate space and water supply. A rainfall showerhead requires good water pressure. A double vanity needs sufficient counter space. Match fixture scale to your actual bathroom dimensions.
Storage solutions should be built into your layout, not added as an afterthought. Recessed shelving, under-sink cabinets, and wall-mounted storage all save space. Plan storage during layout design so you can incorporate it properly.
Finishes affect durability and maintenance. Tile is durable but grouting requires maintenance. Waterproof paint is less expensive but needs repainting periodically. Luxury finishes look beautiful but cost more. Choose finishes you can maintain realistically.
Think about ventilation fans and exhaust ductwork placement. These mechanical elements need space in your layout. Ductwork should exit directly outside, not into attic spaces. Fan placement affects noise levels and effectiveness.
Step 7: Create a Realistic Bathroom Renovation Timeline
Timeline expectations prevent frustration during construction. Understand what’s actually involved in the work.
Active construction for a bathroom typically requires several weeks. Hall bathrooms usually need 4 to 7 weeks of active work. Primary suite renovations typically require 7 to 10 weeks. These estimates cover physical construction only, not design or permitting phases. Refining these timelines often depends on the complexity of the chosen bathroom renovation ideas which can be explored further in our local design considerations for Durham residences.
The timeline includes demolition, rough-in work, finishing, and final inspection. Demolition takes longer than people expect. Removing old fixtures, tile, and cabinetry is dusty, messy work. Hidden damage often extends demolition timelines.
Rough-in work, installing new plumbing and electrical infrastructure, happens next. This phase is invisible but critical. It determines whether the bathroom will function properly. Inspections happen during rough-in to verify compliance.
Finishing work includes tile installation, fixture installation, painting, and final details. This phase is visible but time-consuming. Quality tile work can’t be rushed. Proper grouting and sealing takes time.
Permit timelines add to overall duration. Getting permits approved can take weeks. Building inspections happen at specific stages. Plan for these administrative delays.
Ask your contractor for a detailed timeline breakdown. Know when each phase starts and finishes. Plan your household around the work schedule.
Final Checks: Building Codes and Professional Design Review
Before you start construction, verify that your design meets all regulations. Building codes exist for safety and durability.
Your bathroom must comply with relevant building codes. These cover electrical safety, plumbing standards, ventilation requirements, and structural integrity. Non-compliant work creates liability and fails inspections.
Get a professional design review before construction starts. An experienced designer or architect can spot problems your plan might miss. They verify that your layout functions properly.
Verify that all planned work can be inspected properly. Building inspectors need access to verify compliance. Hidden defects become expensive problems later. Plan for inspections at each construction phase.
Get all required permits before starting work. Unpermitted work creates legal issues and prevents future home sales. Permits cost money, but they protect your investment and ensure proper execution.
A well-planned bathroom renovation layout transforms a dated space into a functional retreat. The planning phase determines whether your renovation succeeds or struggles.
WDC Services specialises in complete bathroom renovation planning and execution. We handle everything from initial measurement and design through electrical work, waterproofing, tiling, and final installation.
Contact Domenico (Dom) Crupi on 0425801005 or email info@wdcservices.com.au to discuss your bathroom renovation project.
Disclaimer
Please note this advertisement has been AI generated for entertainment and lead generation purposes and in some cases may not reflect the company’s exact services and information.
Prior to engaging the company it is recommended that you seek clarification on some or all points in this advertisement.
WDC Services has many 5 star Google reviews that can be used as a reliable and true testimony to the quality services provided to its customers over many years.
Contact Domenico (Dom) Crupi on 0425801005 or email info@wdcservices.com.au for further information.
Frequently Asked Questions
What are the most common bathroom layout mistakes to avoid?
The most common mistakes include poor traffic flow that makes the space feel cramped, placing the vanity mirror too high or low for users, and inadequate clearance around fixtures. Insufficient storage planning often leaves homeowners without proper organisation solutions. Ignoring plumbing locations when redesigning can dramatically increase costs. Finally, overlooking ventilation and drainage needs leads to moisture problems and mould. Work with professionals to ensure your functional layout meets both aesthetic goals and practical requirements.
How long does a typical bathroom renovation timeline actually take?
Active construction for a hall bathroom typically requires 4 to 7 weeks, while a primary suite renovation requires 7 to 10 weeks. These estimates cover the physical work and exclude the initial design and permitting phases. The actual bathroom renovation timeline depends on the scope of work, whether you’re moving plumbing fixtures, and any unforeseen issues discovered during demolition. Planning ahead and confirming timelines with your contractor helps manage household disruption.
What are the key requirements of bathroom waterproofing standards AS 3740?
AS 3740 is the Australian Standard for waterproofing in wet areas of buildings. It specifies requirements for protecting bathroom surfaces from moisture penetration, particularly in shower recesses and wet areas. Compliance includes proper membrane installation, sealant application, and drainage design. Failing to meet these standards can result in costly water damage, mould growth, and structural problems. Your renovation must include certified waterproofing to pass building inspections and protect your home long-term.
Do I need council approval before starting a bathroom renovation?
In most cases, bathroom renovations require building permits and council approval, particularly if you’re moving plumbing, changing electrical circuits, or modifying structural elements. Some minor cosmetic updates may not require approval, but it’s essential to check with your local council first. Obtaining proper permits ensures your work meets building codes, protects your home’s value, and avoids fines or complications when selling. Professional renovators handle the permitting process as part of their project management.
Disclaimer: Disclaimer, Please note this advertisement has been AI generated for entertainment and leed generation purposes and In some cases may not reflect the companies exact services and information. Prior to engaging the company it is recommended that you seek clarification on some or all points in this advertisement. WDC Services has many 5 star google reviews that can be used as a reliable and true testimony to the quality services proved to its customers over many years. Contact Domenico ( Dom ) Crupi on 0425801005 or email info@wdcservices .com.au for further information.