
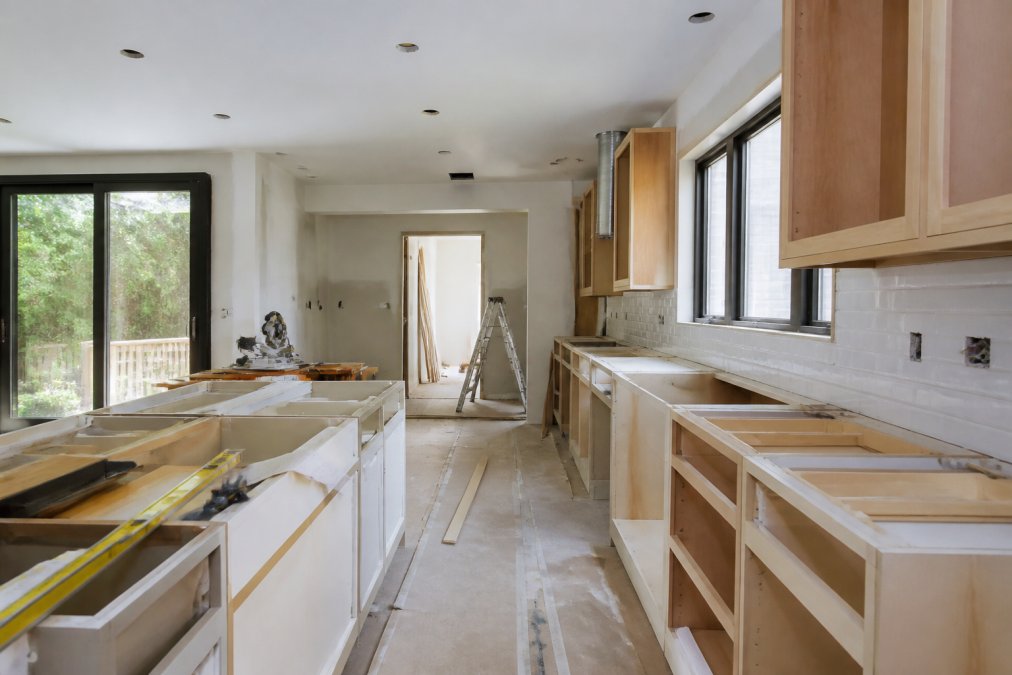
Table of Contents
- Average Kitchen Renovation Timelines by Project Scope
- Kitchen Renovation Timeline Stages Explained
- Stage 1: Planning, Design, and Approvals (Weeks 1-8)
- Stage 2: Demolition and Site Preparation (Week 1-2 of Construction)
- Stage 3: Rough-In Services (Week 2-3)
- Stage 4: Cabinetry and Joinery Installation (Week 4-6)
- Stage 5: Benchtop and Splashback Installation (Week 6-7)
- Stage 6: Tiling, Waterproofing, and Finishing (Week 7-8)
- Stage 7: Final Installation and Handover (Week 8-9)
- Key Factors That Influence Renovation Duration
- Hidden Kitchen Renovation Lead Times: Permits and Materials
- Living Through the Construction Phase Without Losing Your Mind
- Why Hiring a Kitchen Renovation Project Manager Saves Weeks
- How to Build a Realistic Kitchen Renovation Schedule
- Frequently Asked Questions
Last Updated: September 9, 2026
The average kitchen renovation takes 13.3 weeks of active construction, but the full journey from first sketch to final splashback typically stretches to 63 weeks when you include planning and design (EXTERNAL_LINK: HIRI 2026 market expectations report | hiri.org) (hiri.org). That gap between “construction time” and “total project time” is where most renovation timelines fall apart. This guide from WDC Services breaks down exactly how long a kitchen renovation takes at every stage, so you can plan with confidence instead of guessing.
A kitchen renovation involves demolition, structural changes, cabinetry, benchtops, splashbacks, plumbing, electrical wiring, and appliances. Understanding the full timeline before you start is the single biggest factor separating smooth projects from those that drag on for months.
Average Kitchen Renovation Timelines by Project Scope
Kitchen renovation timelines vary dramatically based on scope. Cosmetic upgrades take 1 to 4 weeks, midrange projects run 2 to 4 months, and complete renovations need 4 to 6+ months (EXTERNAL_LINK: KitchenSearch timeline estimates | kitchensearch.com) (kitchensearch.com). For context, a full-scale remodel typically spans 5 to 8 months total, with on-site work condensed into a 6 to 12-week active construction window (EXTERNAL_LINK: CAC by Design renovation guide | cacbydesign.com) (cacbydesign.com).
| Project Scope | Active Construction | Total Timeline | Typical Work Involved |
|---|---|---|---|
| Cosmetic upgrade | 1-4 weeks | 1-2 months | New fixtures, paint, hardware |
| Midrange renovation | 2-4 months | 3-5 months | New cabinetry, benchtop, appliances |
| Full-scale remodel | 13.3 weeks average | 5-8+ months | Structural changes, full reconfiguration |
The key distinction is whether you’re refreshing surfaces or changing the floor plan. Moving walls, relocating plumbing, or ordering custom joinery commits you to a longer project lifecycle.
Kitchen Renovation Timeline Stages Explained
The real timeline is defined by the dependencies between trades and the specific tasks within each phase. Here is a detailed, week-by-week breakdown of a typical full-scale renovation.
Stage 1: Planning, Design, and Approvals (Weeks 1-8)
This phase often runs parallel to other commitments:
- Initial consultation and site measure (Week 1): Your designer or project manager takes detailed measurements and discusses your brief.
- Conceptual design and layout (Weeks 2-4): You decide on the floor plan, cabinetry layout, and appliance placement. Changes here are cheap; once you order custom cabinetry, they become expensive.
- Material and finish selection (Weeks 3-6): Select benchtops, splashbacks, tapware, and cabinet finishes, making final decisions on high-lead-time items.
- Permit and council approval (Weeks 4-8+): Structural changes require a building permit from your local council or a private certifier. Assessment takes 10 to 20 business days, but if flagged for more information, the clock resets, a ‘hidden’ timeline that can easily add a month.
Stage 2: Demolition and Site Preparation (Week 1-2 of Construction)
This is the most physically disruptive stage, but also the most predictable.
- Day 1-3: The team disconnects and removes all appliances, cabinetry, and benchtops.
- Day 3-5: Demolition of walls, removal of old flooring, and stripping of tiles. If removing a load-bearing wall, a structural engineer must have specified the beam, and a building surveyor must inspect the installation before it’s enclosed.
- Day 5-7: Rough site clean-up and preparation for the next trade. Hidden problems surface here, for example, existing wiring not meeting Australian Standards (AS/NZS 3000), requiring a rewire that adds days.
Stage 3: Rough-In Services (Week 2-3)
This stage is invisible in the final result, but it is the backbone of the project.
- Plumbing rough-in (Week 2): A licensed plumber moves or adds supply lines and waste pipes for the sink, dishwasher, and butler’s pantry before walls are closed up.
- Electrical rough-in (Week 2-3): An electrician runs new circuits for lighting, power points, and appliances like a rangehood or induction cooktop, plus cabling for under-cabinet lighting.
- Carpentry and structural work (Week 2-3): If removing a wall, the beam is installed now. The carpenter frames new wall openings and prepares the ceiling for downlights.
Stage 4: Cabinetry and Joinery Installation (Week 4-6)
This is the longest single stage and the one where delays are most visible.
- Week 4: Custom cabinetry is delivered and installed. Two joiners typically take 5-10 days to install a full kitchen, levelling cabinets, securing them to walls, and fitting doors and drawer fronts.
- Week 5-6: Joiners install kickboards, internal shelving, and custom features like a pantry pull-out or wine rack. The splashback is also installed now if it’s a tile or stone product that doesn’t require a separate fabricator.
Stage 5: Benchtop and Splashback Installation (Week 6-7)
This stage is a critical dependency. The benchtop template is taken immediately after the base cabinets are installed and levelled.
- Template and fabrication (Week 6-7): For stone benchtops, a template is taken of the exact site, then the slab is cut and polished off-site over 7-10 business days, a major scheduling factor.
- Installation (Week 7): The installation team delivers and fits the benchtop in a one-day job requiring careful coordination. The sink is often installed simultaneously for a seamless seal.
Stage 6: Tiling, Waterproofing, and Finishing (Week 7-8)
- Waterproofing (Week 7): If your kitchen adjoins a wet area, or if you have a butler’s pantry with a sink, a waterproofing membrane must be applied to the floor and walls. This needs 24-48 hours to cure.
- Tiling (Week 7-8): The tiler will install the splashback tiles and any floor tiles. This is a skilled trade, and the quality of the finish is highly visible. Allow 3-5 days for tiling and grouting.
- Painting and caulking (Week 8): Final paint touch-ups and caulking around the benchtop and splashback complete the visual finish.
Stage 7: Final Installation and Handover (Week 8-9)
- Appliance installation (Week 8): The oven, cooktop, dishwasher, and rangehood are installed and connected. This is often done by the supplier or a licensed technician.
- Final electrical and plumbing connections (Week 8): The electrician returns to install power points, connect the oven, and fit light fixtures. The plumber connects the sink, tapware, and dishwasher waste.
- Final inspection and handover (Week 9): Your project manager will do a final walkthrough with you, checking for any defects or incomplete items. This is your chance to raise any issues before the team leaves.
This sequence shows why active construction rarely compresses below 6 weeks for a full renovation: the dependencies are sequential, you cannot install a benchtop before the cabinets are levelled, nor tile a splashback before the benchtop is in place. A professional project manager coordinates these handoffs, but the physical work takes time.
Key Factors That Influence Renovation Duration
The biggest variable in any kitchen renovation timeline is project scope. Contractor availability also plays a role, with quotes ranging from 8 weeks to 6 months for similar work.
Hidden issues discovered during demolition, outdated wiring, non-compliant plumbing, or water damage, add days or weeks. Custom joinery and benchtop fabrication are frequently the critical path, with lead times of 3 to 6 weeks common.
Trade coordination is where projects either flow or stall. Delays in one trade ripple through every subsequent step, where project management experience pays for itself.
Hidden Kitchen Renovation Lead Times: Permits and Materials
The timelines most guides quote rarely include the hidden lead times that actually govern your project. Council approval and building permits can add 4 to 8 weeks, particularly for structural changes or alterations to the building envelope.
Material lead times are equally underestimated. Natural stone benchtops, custom cabinetry, and imported tiles carry procurement timelines that must be scheduled before construction begins. A kitchen renovation with custom joinery requires ordering materials 4 to 6 weeks ahead, and popular products often have backorders.
The solution is sequencing: order long-lead items during the design phase, not after demolition. A professional project manager places benchtop and cabinetry orders the moment measurements are confirmed, often compressing the total project lifecycle by several weeks.
Living Through the Construction Phase Without Losing Your Mind
The active construction phase of a full-scale kitchen renovation runs 6 to 12 weeks (EXTERNAL_LINK: CAC by Design high-performance guide | cacbydesign.com). Most timeline guides stop at the schedule, but they miss the practical question every homeowner faces: how do you actually live without a kitchen for two to three months? This is where projects succeed or fail on a personal level, and it’s rarely covered in the technical guides.
Setting Up Your Temporary Kitchen
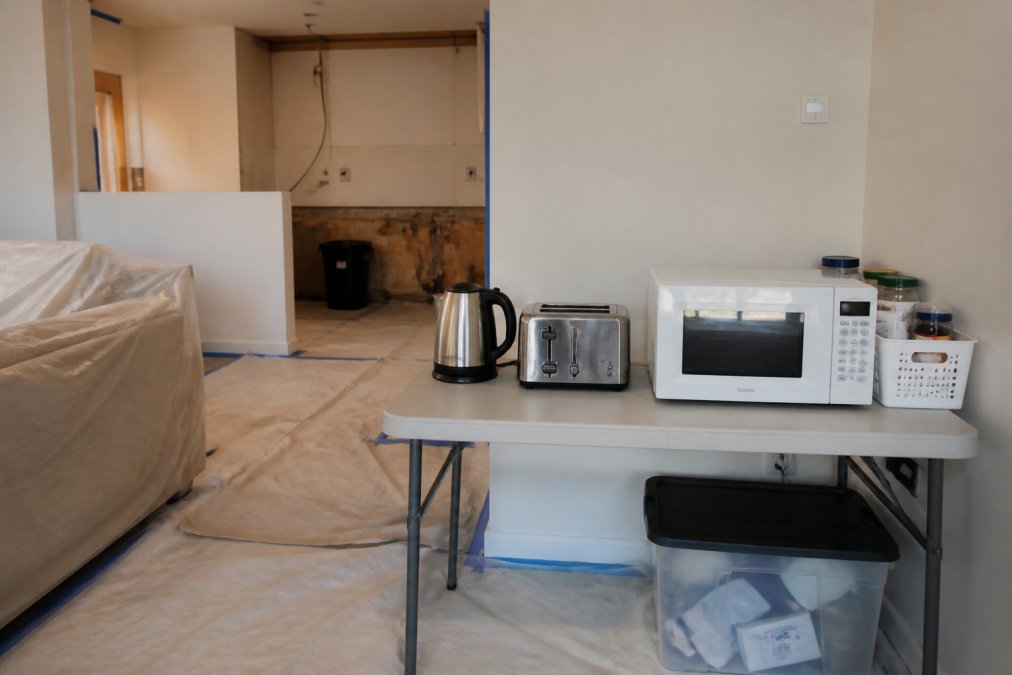
Your temporary kitchen is your lifeline, replicate the core functions of your real kitchen in a space that won’t be disrupted by trades. A laundry room, large bathroom, or corner of the living room all work.
- The ‘Big Three’ appliances: A kettle, a toaster, and a microwave are non-negotiable. Add a single-burner induction cooktop for meals that need actual cooking. A slow cooker or an air fryer can also be a game-changer for weeknight dinners.
- The washing station: If you don’t have a laundry sink available, a large plastic tub in the bathtub works for washing dishes. Fill a kettle for hot water, and use a drying rack nearby.
- The prep zone: A sturdy table or a trolley with a clean surface is your benchtop. Keep your knives, a chopping board, and essential utensils in a portable caddy.
- The pantry: A shelving unit or a set of clear plastic bins can hold your dry goods, spices, and staples. Label everything clearly so you don’t have to hunt for the olive oil while you’re cooking.
Managing the Disruption
The physical disruption is only half the challenge. The other half is the mental load of having trades in your home.
- Dust control: Dust travels further than you expect. Seal doorways with plastic sheeting and painter’s tape, ask trades to use dust extractors, and vacuum the work area daily, protecting both furniture and lungs.
- Trade access: Trades typically start between 7:00 am and 7:30 am. Clear the path to the kitchen and secure pets. If you work from home, plan to work from a café or library on the noisiest days.
- The ‘quiet’ days: Some days have no trades on site while materials dry, benchtops are fabricated, or deliveries are pending. These are not lost days; they are part of the schedule.
Protecting Your Sanity
The stress of living through a renovation is real, reduced functionality, increased noise, and constant decisions. Here’s what helps most homeowners cope:
- Weekly, not daily, communication: Establish a single weekly check-in with your project manager, asking for a written summary of completed and scheduled work. This prevents hovering and gives a clear picture of progress.
- Create a ‘renovation-free’ zone: Designate one room, your bedroom or home office, where no renovation activity or materials occur. Keep it clean and off-limits to dust and chaos.
- Plan for meals, not just cooking: The biggest daily stressor is ‘what’s for dinner’. Create a meal plan for the first two weeks, batch-cook and freeze meals before demolition, and stock up on no-cook options like salads and rotisserie chickens.
- Budget for eating out: Accept that you’ll eat out or get takeaway more often. This is a legitimate budget line item; trying to cook elaborate meals in a temporary setup only adds stress.
Before demolition day, pack a ‘first-night box’. Include your kettle, toaster, one set of cutlery and plates, a sharp knife, a chopping board, coffee, tea, and a takeaway menu. This means you can make a cup of tea and a simple meal on the first chaotic night without rummaging through boxes.
The homeowners who manage best are not those with the biggest budget, but those with a clear plan for living, eating, and communicating during the active work.
Why Hiring a Kitchen Renovation Project Manager Saves Weeks
A kitchen renovation project manager coordinates every trade, order, and approval so you don’t have to. A single point of contact manages the full sequence, the difference between a project that flows and one that stalls.
The weeks saved come from overlapping activities that DIY coordination misses. A project manager orders materials before demolition, books trades in sequence, and resolves issues before they become delays.
WDC Services handles kitchen renovations end to end, integrating electrical work, carpentry, waterproofing, and tiling under one management structure. Our project management approach means you deal with one team rather than coordinating multiple subcontractors.
How to Build a Realistic Kitchen Renovation Schedule
Start with your scope, then add buffer for hidden factors. A realistic kitchen renovation schedule allocates 4 to 8 weeks for design and approvals, 4 to 6 weeks for material lead times, and 6 to 12 weeks for active construction.
Add 2 weeks of buffer for every month of construction, as material delays and unexpected site conditions are normal. Confirm every lead time in writing before committing to a start date.
Review your schedule weekly and track progress against milestones. A good contract includes a defined timeline with clear stages, and your project manager should report against it.
The most common schedule killer is starting demolition before confirming benchtop and cabinetry lead times. If your benchtop takes 6 weeks to fabricate and you’ve already demolished, your kitchen sits unusable while you wait. Order long-lead materials before any work begins.
A kitchen renovation timeline is only as reliable as the planning behind it. The average project runs 13.3 weeks of construction, but the full journey typically spans over a year when you account for design, approvals, and material lead times.
At WDC Services, we manage kitchen renovations from initial design through electrical, carpentry, waterproofing, and tiling. Our full project management approach helps you navigate your renovation. Contact us to discuss your kitchen renovation and get a realistic timeline for your project.
Frequently Asked Questions
Can you renovate a kitchen in under four weeks?
Yes, but only for cosmetic or minor renovations. Swapping benchtops, replacing a splashback, repainting cabinetry doors or installing new fixtures typically takes 1 to 4 weeks. A full kitchen renovation that involves new cabinetry, plumbing rough-in and electrical wiring will not fit that window. Industry data shows full-scale projects need 6 to 12 weeks of active construction, with total timelines stretching to 4 months or more once design and material lead times are included.
What is the typical lead time for custom cabinetry?
Custom cabinetry lead times are often the longest single delay in a kitchen renovation timeline. After your final measurements are confirmed, expect 4 to 8 weeks for custom joinery to be manufactured and delivered. This is why the planning phase matters: ordering cabinetry early, before demolition starts, can keep your kitchen renovation timeline stages on track. Standard off-the-shelf cabinetry ships faster but limits your layout options and finish choices.
Do I need to move out during a kitchen renovation?
For a full renovation lasting 6 to 12 weeks of construction, most families set up a temporary kitchen in a laundry or living area with a kettle, microwave and bar fridge. You can usually stay home, but expect dust and limited access to water and power. For structural changes like moving walls or rerouting plumbing, contractors will often recommend moving out for the demolition phase. Discuss this with your project manager before work begins so you can plan meals and routines around the construction schedule.
What are the main factors that delay a kitchen renovation?
The most common delays are material procurement issues and unexpected structural discoveries. Engineered stone benchtops and custom cabinetry often have lead times of several weeks. Once demolition starts, contractors may find outdated wiring or plumbing that needs upgrading to meet current Australian standards, adding time and cost. Council approval for structural changes can also stretch the total project timeline significantly. A project manager coordinates trades and orders materials early to minimise these delays.
Disclaimer: Disclaimer, Please note this advertisement has been AI generated for entertainment and leed generation purposes and In some cases may not reflect the companies exact services and information. Prior to engaging the company it is recommended that you seek clarification on some or all points in this advertisement. WDC Services has many 5 star google reviews that can be used as a reliable and true testimony to the quality services proved to its customers over many years. Contact Domenico ( Dom ) Crupi on 0425801005 or email info@wdcservices .com.au for further information.