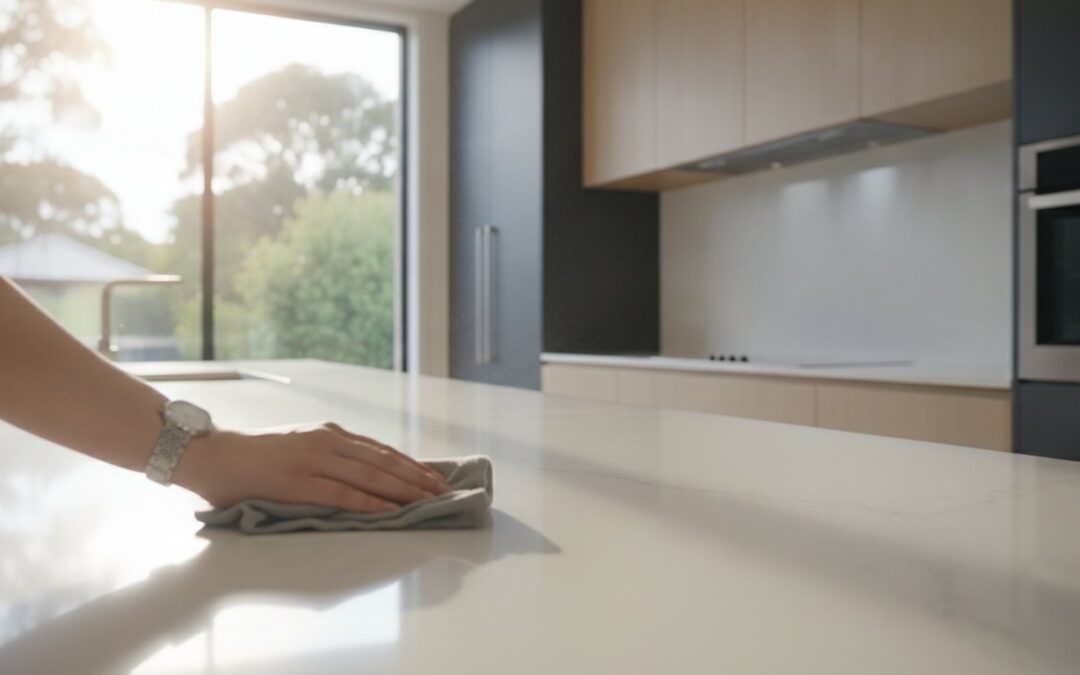
You have finally reached the end of your kitchen or bathroom renovation, but instead of the sparkling finishes you envisioned, you are staring at a layer of fine white dust that has settled into every drawer and crevice. It’s a stressful moment for many Melbourne homeowners who worry that a single wrong wipe could scratch their brand-new Caesarstone benchtops or damage expensive tiles. You might even be questioning if it’s safe to turn on your air conditioning while that relentless drywall dust is still lingering in the air. This is where a methodical post-renovation cleaning checklist becomes your most valuable tool.
We understand that you want to enjoy your new space without the lingering mess of construction. This 2026 guide provides the exact steps you need to safely transform your dusty site into a pristine, move-in-ready home. By following our professional-grade process, you can ensure your high-end investment is protected and your air quality is restored. We’ll walk you through a structured three-phase approach that covers everything from managing construction debris to the final, meticulous detail polish that brings order and clarity back to your environment.
Key Takeaways
- Master the three-phase cleaning methodology to systematically transition your home from a construction site to a pristine living space.
- Protect your investment by using our professional post-renovation cleaning checklist to safely treat high-end finishes like Caesarstone and custom cabinetry.
- Learn why a top-down dusting approach is essential for protecting your split systems and ensuring the air quality in your home is safe.
- Identify critical safety protocols for your new electrical installation, including how to clear dust from GPOs and delicate LED strip lighting.
- Discover the peace of mind that comes with a managed renovation where quality workmanship and “broom-clean” standards are guaranteed.
Understanding the Three Phases of Post-Renovation Cleaning
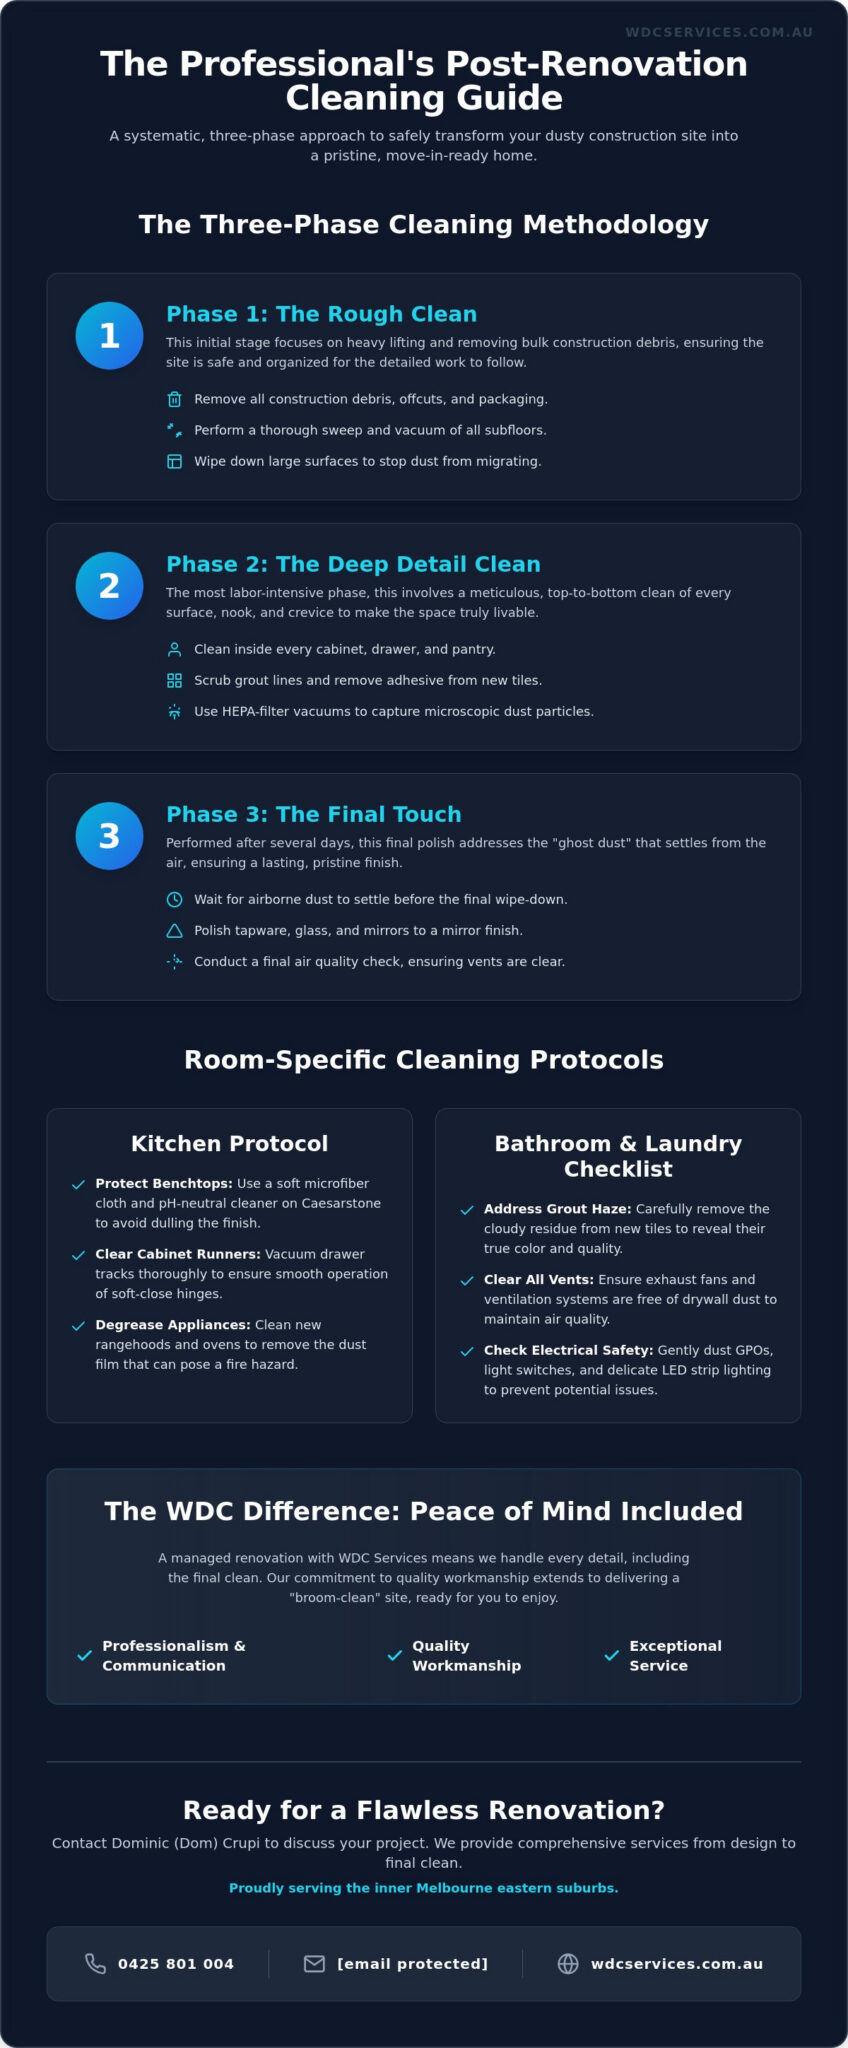
A successful renovation project relies on a systematic approach that doesn’t stop at the installation of your new kitchen or bathroom. To achieve that pristine, magazine-ready look, you need a disciplined strategy. We view the cleaning process as a three-stage operation designed to protect your investment and ensure your family’s health. Attempting to do everything at once often leads to frustration, as fine dust continues to settle for days after the heavy work concludes. By following a structured post-renovation cleaning checklist, you can manage the mess without risking damage to your high-quality finishes.
Phase 1: The Rough Clean (Construction Cleanup)
Before we can focus on the shine, we must address the structural mess. This stage involves the heavy lifting, such as removing offcuts of timber, discarded packaging, and leftover materials. It’s a critical step for properly disposing of renovation debris, ensuring that the site remains safe and organized for the final stages of the build. During this phase, we prioritize sweeping and vacuuming subfloors before any permanent floor coverings are installed. This prevents trapped dust from grinding against your new surfaces later. We also perform a preliminary wipe-down of large surfaces to stop dust from migrating into the unaffected rooms of your home.
Phase 2: The Deep Detail Clean
This is the most labor-intensive part of your post-renovation cleaning checklist. While the rough clean makes the room walkable, the detail clean makes it livable. This phase requires a meticulous eye for detail and the use of specialized equipment, such as HEPA-filter vacuums, to capture microscopic particles. We focus on every square inch, cleaning inside every custom cabinet, drawer, and pantry. Fine drywall dust is notoriously persistent; it often settles on top of door frames, light fixtures, and window tracks. Our team also spends significant time scrubbing grout lines and removing adhesive residue from new tiles to reveal the true quality of the workmanship and the beauty of your chosen materials.
Phase 3: The Final Touch. The final phase occurs several days after the detail clean. Timing is everything here. Even with high-quality extraction, fine particles remain suspended in the air immediately after construction. We wait for this “ghost dust” to settle before performing a final, light wipe-down of all horizontal surfaces. This stage focuses on polishing tapware to a mirror finish and ensuring your air quality is restored. By separating these tasks, we ensure that your new kitchen or bathroom stays clean rather than being re-contaminated by falling particles. This methodical flow mirrors the organized nature of our renovation services, bringing order and clarity back to your inner Melbourne eastern suburbs home.
The Room-by-Room Checklist: Kitchens, Bathrooms, and Laundries
Once the heavy construction debris has been cleared, the focus shifts to the specialized surfaces that define your new home. Each room requires a different set of protocols to ensure that high-end materials are cleaned without being compromised. Using a room-by-room post-renovation cleaning checklist ensures no detail is overlooked, from the visible benchtops to the hidden mechanisms inside your cabinetry. While cleaning, remember that removing every trace of fine particles is about more than just aesthetics. Understanding the health risks of renovation dusts is vital for families, as these microscopic irritants can affect respiratory health long after the builders have left.
The Kitchen Cleaning Protocol
Protecting your Caesarstone benchtops requires a gentle touch. You should avoid abrasive pads or harsh chemicals that can dull the engineered stone’s factory finish. Instead, use a soft microfiber cloth and a pH-neutral cleaner to lift dust. Inside the cabinets, fine particles often settle in the drawer runners. We recommend vacuuming these tracks thoroughly to ensure the smooth operation of your soft-close hinges. Don’t forget to degrease the interior of new rangehoods and ovens. Even if they haven’t been used for cooking, they often collect a film of dust during the final stages of installation that can become a fire hazard if left unaddressed.
The Bathroom and Laundry Checklist
Bathroom surfaces present unique challenges, particularly when it comes to grout haze. This cloudy residue can ruin the look of high-quality tiles if not addressed with specialized, non-acidic cleaners. For those with matte black or brass tapware, avoid any cleaners containing ammonia or bleach, as these can strip the delicate coatings. In the laundry, check the floor wastes and troughs for construction debris. Plaster offcuts or tile spacers frequently fall into drains during the build, which can lead to significant blockages once you begin using your new appliances. Many homeowners find that partnering with a team that delivers high-quality bathroom renovations ensures these details are managed correctly from day one.
Common areas often hide the most persistent mess. Baseboards and window tracks act as magnets for drywall dust, requiring a two-step process of vacuuming followed by a damp wipe. Light switches and GPOs (power points) also need attention. Dust ingress into these components isn’t just unsightly; it can interfere with the electrical connection. Meticulous attention to these smaller details provides the validation that your new investment is truly protected and ready for use. By following this structured post-renovation cleaning checklist, you move beyond a simple tidy-up and into a state of professional-grade readiness.
Tackling the ‘Invisible’ Mess: Dust, Vents, and Split Systems
While your new benchtops and tiles might look pristine, the most pervasive threat to your home’s air quality remains hidden from plain sight. Fine construction dust is a relentless invader that travels through air currents and settles deep inside your mechanical systems. Incorporating air quality checks into your post-renovation cleaning checklist is essential to prevent long-term damage to your home’s infrastructure. Without a disciplined approach to these “invisible” areas, you risk circulating particulates every time you turn on a fan or heater.
To prevent re-contamination, we always recommend a top-down dusting method. This systematic process starts at the highest points of the room, such as ceiling fans and the tops of door frames, and moves downward toward the floor. By working with gravity, you ensure that any dislodged dust is captured in the final vacuuming stage rather than settling on surfaces you’ve already cleaned. It’s also vital to follow safe renovation and cleanup practices by using a vacuum equipped with a HEPA filter. Standard domestic vacuums often lack the filtration required to trap microscopic silica or plaster particles, essentially blowing the dust back into the room through the exhaust.
Protecting Your Split System Air Conditioning
In the inner Melbourne eastern suburbs, split system air conditioners are a household standard, but they’re incredibly vulnerable during a build. You should never run your AC during active sanding or plastering. The fine particulates bypass standard mesh filters and coat the internal cooling coils, which can lead to motor strain or premature failure. To clean your unit, carefully remove the internal filters and rinse them under lukewarm water. WDC Services’ tip: Always arrange for professional commissioning or a service check after a major renovation. Since we manage the electrical components of your project, we ensure that your climate control systems are clean and operating at peak efficiency before you move back in.
Air Quality and Ventilation
Exhaust fans in your new bathroom or laundry act as magnets for airborne debris. Wipe down the external covers and use a vacuum attachment to clear the internal housing. Don’t overlook your window tracks and flyscreens. These areas often trap a significant amount of grit that can interfere with window seals or blow back inside during a breeze. For the best results, we suggest running high-quality air purifiers for 48 hours after the final clean. This helps catch any remaining airborne particulates that haven’t yet settled, providing the ultimate peace of mind for your family’s health. Our comprehensive services are designed to bring this level of order and clarity to every complex environment we manage.
Safety First: Electrical Checks and Debris Disposal
Safety is the foundation of any successful project. While the previous sections of our post-renovation cleaning checklist focused on aesthetic finishes and air quality, this stage addresses the functional integrity of your home. Cleaning around new electrical installations requires more than just a damp cloth; it demands an understanding of how construction residue interacts with live components. We prioritize this methodical check to ensure that your new kitchen or bathroom isn’t just beautiful, but also safe for daily use. This proactive approach prevents future maintenance issues and protects the high-quality finishes you’ve just invested in.
Electrical Safety Post-Renovation
Fine plaster dust is incredibly invasive. It often finds its way into GPOs (power points) and light switches, creating a “crunchy” or gritty sensation when they’re operated. This indicates dust ingress that could potentially interfere with the electrical connection. When cleaning around new LED strip lighting or delicate pendant fixtures, you must ensure the fittings are secure before dusting. We recommend using a dry, soft brush or a low-powered vacuum attachment to clear these areas safely. For those still in the planning phase, reviewing Essential Electrical Upgrades for a Melbourne Reno can help you design a system that’s both modern and resilient. Remember that all electrical work in Victoria legally requires a Certificate of Electrical Safety (COES) to confirm compliance with the Electricity Safety Act 1998.
Managing Renovation Waste in Melbourne’s East
Melbourne’s eastern suburbs, including Balwyn and Kew, have specific regulations regarding construction and demolition waste. Under the Environment Protection Act 2017, all individuals have a general environmental duty to minimize risks to human health and the environment. This requires the proper classification and segregation of sharp offcuts, nails, and glass. While some homeowners hope to use standard hard waste collections, these are often restricted to household items rather than building materials. Most significant renovations require a managed skip bin to ensure compliance with EPA Victoria standards. Handling these materials requires care to avoid injury from hidden hazards like discarded screws or jagged tile edges.
At WDC Services, we believe that quality workmanship includes a disciplined approach to site management. We manage the site clean-up as a core part of our project fees, ensuring all debris is removed safely and legally from your property. This allows us to maintain a “broom-clean” standard throughout the build and a pristine finish at the end. If you are looking for a reliable partner to manage your comprehensive laundry or bathroom renovation, Dominic Crupi and the team are ready to help. We take pride in delivering high-quality finishes while ensuring every technical detail is handled with precision.
The WDC Difference: Why a Managed Renovation Includes Peace of Mind
Choosing a renovation partner involves more than just selecting a team that can install a vanity or wire a kitchen. It requires a disciplined partner who understands that the project isn’t truly complete until the space is pristine and functional. At WDC Services, we distinguish ourselves by integrating site management into every stage of the build. While a standard post-renovation cleaning checklist is a helpful guide for homeowners, our clients often find that our internal “broom-clean” standards significantly reduce the burden of final cleanup. We treat your home with the respect it deserves, ensuring that construction debris is managed daily rather than left to accumulate.
Dominic Crupi leads our team with a focus on quiet confidence and meticulous oversight. From the initial design phase to the final polish of your matte black tapware, Dom ensures that quality workmanship remains the priority. This full-service approach is particularly valued in the inner Melbourne eastern suburbs, where homeowners expect high-level performance and attention to detail. We don’t just hand over a construction site; we deliver a transformed environment where every drawer runner is smooth and every surface is protected. Our reputation is built on long-term relationships and a track record of delivering high-quality finishes that stand the test of time.
Professionalism and Communication
Reliability is the cornerstone of our operations. We understand that home renovations can be disruptive, so we prioritize clear, proactive communication to keep you informed throughout the construction and cleaning phases. Our team of licensed tradesmen is punctual and disciplined, arriving on schedule and maintaining an organized workspace. This structured flow allows us to manage complex details so you don’t have to. If you are beginning your journey, our guide on How to Plan Kitchen and Bathroom Renovations in Melbourne’s Eastern Suburbs provides a methodical roadmap for success. Our previous clients highly recommend us for this level of transparency and professionalism.
Ready to Move In?
The final stage of our process is a comprehensive walkthrough to ensure every aspect of the project meets the WDC Services quality guarantee. We validate that your investment is protected and that the “done” state of your project is clearly defined. Whether we have completed a complex laundry renovation or a bespoke bathroom upgrade, we ensure the space is ready for immediate use. If you are ready to experience a renovation managed with precision and pride, we invite you to reach out for a personalized discussion about your vision.
You can contact Dominic (Dom) Crupi directly at 0425801004 or via email at info@wdcservices.com.au to discuss your upcoming project. We look forward to acting as an extension of your team and bringing order to your home renovation. Book a consultation for your Melbourne renovation today and discover the peace of mind that comes with expert management.
Step Into Your Pristine New Home
Transforming a dusty construction site into a functional sanctuary requires a disciplined approach. You now have the framework to manage the three critical phases of cleanup, from the initial debris removal to the final polish of your high-quality finishes. By utilizing this post-renovation cleaning checklist, you ensure that every surface is protected and your home’s air quality is safely restored. A successful project is defined by these final details, validating the time and investment you have put into your new space.
We take immense pride in delivering comprehensive services that go beyond the build. Our full-service team of licensed tradesmen, managed directly by Dominic Crupi, specializes in high-end bathroom and laundry renovations across Melbourne’s eastern suburbs. We manage the complex technical details so you don’t have to. Ready for a stress-free renovation with expert cleanup included? Contact Dominic Crupi at WDC Services today or call 0425801004. Your dream home is ready for its final reveal, and we’re here to ensure it is perfect.
Frequently Asked Questions
Is the contractor responsible for post-renovation cleaning?
Standard industry practice varies, but most reputable builders provide a “broom-clean” finish as part of their service. This means they remove large debris, offcuts, and bulk dust, but they do not typically perform a deep detail clean. At WDC Services, we integrate site management into our project fees to ensure a high standard of cleanliness throughout the build, though a final specialist clean is often recommended for a move-in-ready finish.
How do I get fine white dust off my floors after a renovation?
You should use a two-step process involving a HEPA-filter vacuum followed by a damp microfiber mop. Dry sweeping is ineffective because it redistributes fine particulates back into the air. By using a damp mop with a pH-neutral cleaner, you can safely lift the residue without scratching your new floor coverings or leaving streaks. This methodical approach is a core part of any effective post-renovation cleaning checklist.
When is it safe to turn on my split system AC after renovating?
You should only turn on your split system once the final detail clean is complete and all airborne dust has settled. Running the unit while particulates are still present can clog the internal cooling coils and cause permanent motor strain. We recommend checking and cleaning the filters first. If your renovation was extensive, arranging a professional service check ensures the system operates at peak efficiency and maintains your air quality.
What is the best way to clean Caesarstone after construction?
Use a soft cloth with warm, soapy water or a pH-neutral stone cleaner to safely remove construction residue from Caesarstone benchtops. You must avoid abrasive pads or harsh chemicals like bleach, as these can permanently dull the engineered stone’s factory finish. For persistent marks or adhesive residue, a non-abrasive cream cleanser specifically approved for quartz surfaces is the most reliable solution to protect your investment.
Do I need to hire professional cleaners, or can I DIY the post-reno clean?
While a DIY approach is possible for smaller projects, hiring professionals is often necessary to handle the volume of fine particulates generated by a major build. Professional teams use industrial-grade HEPA vacuums and specialized techniques that are difficult to replicate with standard domestic equipment. Including professional services in your post-renovation cleaning checklist ensures your high-end finishes are protected and your home’s air quality is restored to safe levels.
How long should I wait for dust to settle before the final wipe down?
You should wait at least 48 hours after the construction work concludes before performing your final detail clean. This period allows the microscopic “ghost dust” suspended in the air to settle onto horizontal surfaces. Rushing this step often results in a thin layer of dust reappearing just hours after you have finished cleaning, which forces you to repeat the entire process from the beginning.
What should I do if I find plaster dust inside my power points?
You must never insert anything into a power point; instead, use a vacuum with a soft brush attachment to gently clear the exterior and visible gaps. If the switch feels “crunchy” or gritty when operated, it indicates internal ingress that may require a licensed electrician to inspect or replace the component. Safety is paramount, so ensure you consult a professional if the electrical connection feels compromised or unreliable.
Where can I dispose of renovation waste in Melbourne’s Eastern Suburbs?
Most building waste must be taken to specialized resource recovery centers or managed via a dedicated skip bin service. Local councils in the inner Melbourne eastern suburbs typically do not accept construction materials, such as tiles or plasterboard, in standard hard waste collections. We manage site clean-up as part of our comprehensive services to ensure all debris is disposed of according to current EPA Victoria regulations and environmental standards.
Disclaimer
Please note this advertisement has been AI generated for entertainment and leed generation purposes and In some cases may not reflect the companies exact services and information.
Prior to engaging the company it is recommended that you seek clarification on some or all points in this advertisement .
Wdc services has many 5 star google reviews that can be used as a reliable and true testimony to the quality services proved to its customers over many years.
Contact Domenico ( Dom ) Crupi on 0425801005 or email info@wdcservices .com.au
for further information
Disclaimer: Disclaimer, Please note this advertisement has been AI generated for entertainment and leed generation purposes and In some cases may not reflect the companies exact services and information. Prior to engaging the company it is recommended that you seek clarification on some or all points in this advertisement. WDC Services has many 5 star google reviews that can be used as a reliable and true testimony to the quality services proved to its customers over many years. Contact Domenico ( Dom ) Crupi on 0425801005 or email info@wdcservices .com.au for further information.