
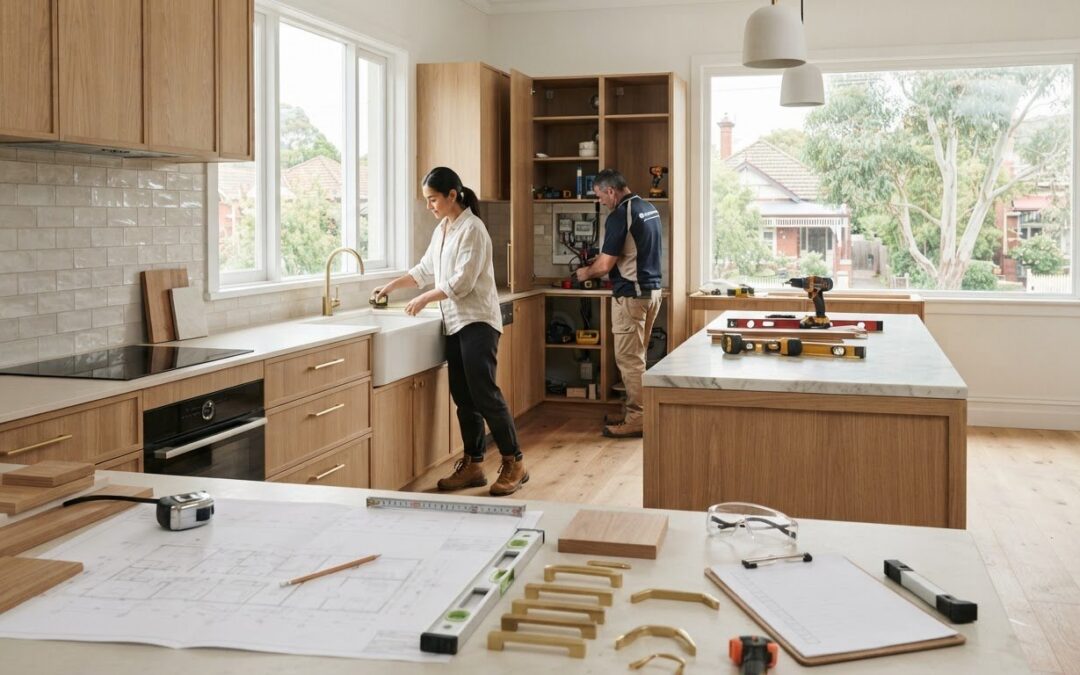
Start a DIY kitchen renovation by turning your plan into an itemised budget, a materials-and-tools list, and a clear work sequence. A practical kitchen renovation planning guide also builds in a 10-20% contingency for unexpected expenses. Arrange qualified help for plumbing or electrical work, and don’t begin demolition until the services have been disconnected.
Doing some of the work yourself can make a kitchen renovation feel more manageable, but it still requires careful measuring and an honest assessment of what you can safely install. This kitchen renovation planning guide explains how to prepare the space, decide whether to fit cabinets yourself or bring in a builder, and organise each stage so measurements, materials and trades align.
It also covers how to choose durable, sustainable materials and modern design details without losing sight of everyday use. The goal is a kitchen that works well, looks considered and is planned to minimise surprises, from the first task to the finishing touches.
Key Takeaways
- Turn your renovation plan into an itemised budget, a materials list and a clear sequence of work before starting.
- Use careful measurements and household needs to guide cabinet, door, benchtop and accessory choices.
- Compare materials for durability, everyday practicality and sustainability, and consider energy-efficient appliances.
- Separate suitable DIY tasks from work that calls for professional skills, especially when planning installation and trades.
- Balance modern design choices with function, and consider WDC Services for bathroom renovations, laundry renovations or electrical work.
How to start a diy kitchen renovation after planning?
Start with an itemised budget, identify any permits and building codes that apply, then list the materials, tools and tasks. A practical work order runs from disconnecting services and demolition to rough-ins, walls and flooring, cabinets, benchtops, appliances and finishing. If you suspect asbestos or a structural change may be involved, pause before disturbing the area.
-
Set a Renovation Budget
Add a 10-20% contingency for unexpected work, such as plumbing complications or electrical upgrades.
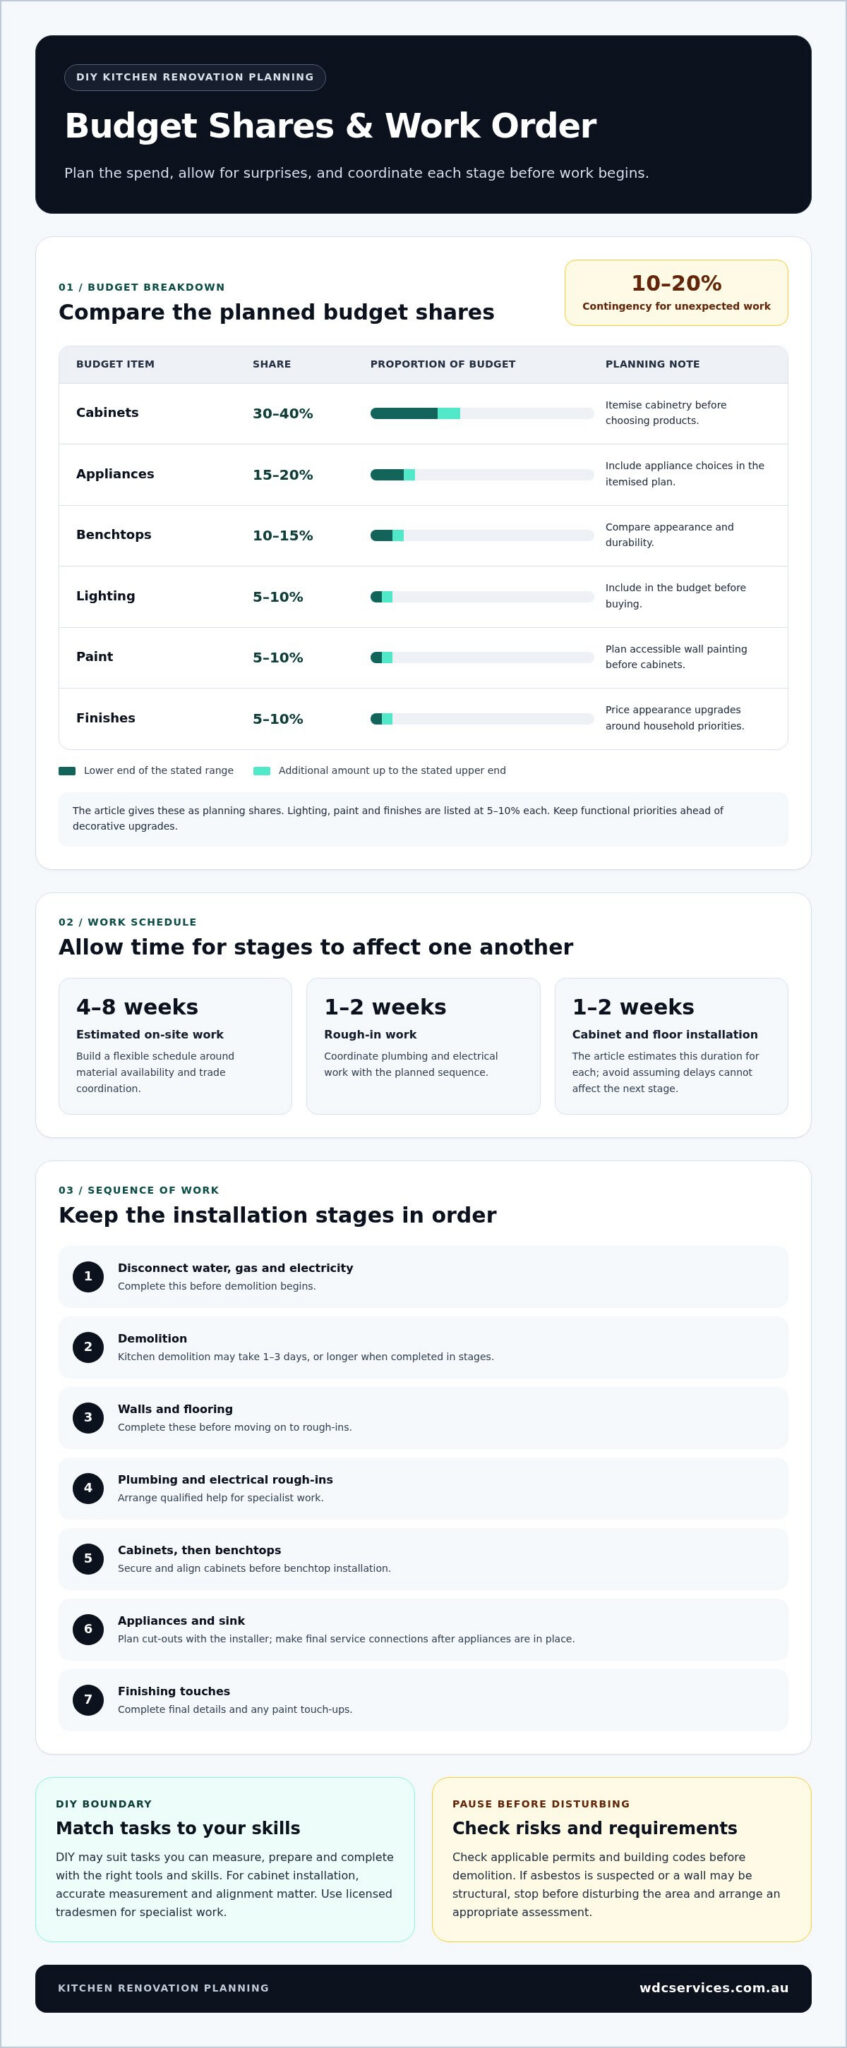
Itemise cabinets, appliances, benchtops, lighting, paint and finishes before choosing products. Cabinets may take 30-40% of the budget, appliances 15-20%, benchtops 10-15%, and lighting, paint and finishes 5-10% each. Prioritise functional elements first, then price the appearance upgrades that matter most to your household.
-
Check Permits, Codes, and Risks
Before demolition, check whether permits apply and review the building codes and regulations relevant to your renovation. Requirements depend on the proposed work, particularly if the layout changes or plumbing, electrical services or walls are affected. Include this check in your written plan rather than leaving it until the last minute.
In an older Australian home, don’t treat suspected asbestos or a potentially structural wall as routine DIY work. Stop before disturbing the material or changing the structure, and arrange an appropriate assessment. DIY can reduce labour costs, but mistakes involving hidden services or structural elements can be costly and unsafe.
-
Plan the Timeline and Work Order
Build a flexible work schedule around material availability and trade coordination. On-site work is estimated at 4-8 weeks. Rough-in work may take 1-2 weeks, as may cabinet and floor installation, so avoid booking each task as if delays cannot affect the next stage.
Write down the work sequence: disconnect water, gas and electricity before demolition; complete demolition; install walls and flooring; then carry out plumbing and electrical rough-ins. Fit cabinets before benchtops, then install appliances and the sink, with final service connections after appliances are in place. Coordinate trade visits to keep the sequence on track.
-
Choose Cost-Saving Decisions
Keep the existing layout if it still supports everyday use. Moving plumbing or electrical points can add complexity, while refreshing paint, lighting or selected finishes can transform the room without replacing everything. Compare each decision with your priorities, and set aside funds for functional improvements before committing to decorative upgrades.
DIY is best suited to tasks you can measure, prepare and complete with the right tools and skills. Make a detailed tools and materials list before buying, and don’t take on cabinet installation if accurate alignment is beyond your experience. Use licensed tradesmen for specialist work. Setting clear task boundaries can protect quality without requiring a complete replacement.
Can I install kitchen cabinets myself?
You can fit cabinets yourself if you can measure accurately, follow the installation instructions and use suitable tools. First decide which tasks match your skills, then plan cabinet selection, demolition, painting and installation in the right order.
- Choose cabinets and doors for the room. Compare pre-made units with custom cabinets. Standard units can simplify selection, while custom cabinetry can suit unusual kitchen widths. Check each cabinet’s dimensions against the room and appliance positions before ordering. Choose door finishes for everyday household use, such as surfaces that are easy to clean, and settle key choices before installation makes changes more difficult.
- Measure the space carefully. Record wall lengths, ceiling height, corners, and the positions of windows, doors and services. Recheck measurements before ordering: an incorrect width can leave gaps or prevent units from fitting. Plan storage around what you keep, including food, utensils, cleaning products and waste. In rooms with tall ceilings, consider double-stacked cabinets for extra storage without changing the kitchen footprint.
-
Demolish and Salvage Cabinetry
Disconnect water, gas and electricity services before demolition begins, then remove old units methodically. If you plan to reuse cabinetry, take it apart carefully and store each piece safely; force can damage doors, fittings or cabinet panels. Kitchen demolition may take 1-3 days, or longer when completed in stages. Check each salvaged unit for damage before designing around it.
-
Paint Before Cabinet Installation
Paint accessible walls before the cabinets go in, then schedule touch-ups after installation. This gives you better access behind and around units and avoids working around finished cabinetry. Protect the flooring and any cabinets being kept from splashes. Let the paint dry according to the product instructions before fitting units, so fresh surfaces aren’t marked during installation.
- Install cabinets, benchtops and finishing elements in order. Fit floor cabinets before wall cabinets, checking alignment as you go. Secure the cabinets before installing benchtops, and coordinate sink and appliance cut-outs with the installer. Choose benchtops for appearance and durability, then make sure tiles, splashbacks, handles and hinges suit the finished layout. Soft-close hardware and accessible storage can improve everyday use, provided each accessory suits the selected cabinet system.
Sustainable materials and energy-efficient appliances
Compare materials and appliances for durability, everyday use, energy performance and fit. Consider product requirements and installation needs before finalising finishes.
-
Select Sustainable Materials
Compare materials based on expected use, maintenance and replacement needs. Laminate is one option for benchtops or cabinetry; weigh its appearance and care requirements against other suitable materials. For a more considered selection, look for products with recycled content or materials that can be repaired or reused, and consider how each choice will perform in your kitchen.
Check current Australian restrictions before specifying engineered stone: Australia banned its use, supply and manufacture from 1 July 2024. Avoid basing your design on that material. Instead, compare available alternatives against your requirements for appearance, cleaning and everyday wear. Bring samples together with cabinet doors and flooring, so colours and finishes work as a coordinated set.
-
Choose Energy-Efficient Appliances
Prioritise appliances by how your household cooks, cleans and stores food. Induction cooking is 90% efficient. Compare the cooktop’s size and installation needs with your cookware, bench layout and electrical plan. Consider the oven and dishwasher in the same review, rather than selecting each appliance without checking how the set fits the kitchen.
Treat these as product estimates, then budget separately for labour, materials and any required service changes.
- Confirm built-in appliance dimensions before finalising cabinetry. Record each appliance’s width, height and depth from its specifications, then compare them with cabinet openings and planned clearances. Check door movement, ventilation requirements and access for future maintenance. Proper ventilation prevents heat and moisture buildup in any cooking space; for readers who also manage commercial food facilities, Air Flow M&E Pte Ltd provides specialized addition and alteration services for kitchen exhaust systems. A built-in oven or dishwasher needs a suitable opening; a cooktop must align with the benchtop cut-out and planned electrical connection.
Include plumbing for the dishwasher and sink in the layout, and coordinate connections with the cabinet and benchtop design. The sink and appliances are generally installed after the benchtops and splashback, although appliances may be installed during benchtop installation. Resolve these choices early to reduce rework and clarify the installation sequence.
- Plan delivery and installation costs together. List the appliance, delivery, installation labour, materials and connection work as separate budget items. This makes it easier to compare models based on their total project impact, not just the purchase price. Confirm that the appliances can reach their final positions through the available access, and have product details ready for the installation team.
Use design inspiration to guide the finish, but let dimensions and practical requirements lead. For example, a black built-in oven needs to suit the cabinet opening and surrounding finishes, while a dishwasher must align with the kitchen’s plumbing plan. Finalise these decisions before ordering to keep materials, trades and appliance installation coordinated.
Installing your kitchen: Do I need a professional builder?
A builder can coordinate a complex renovation, while a confident DIYer may manage straightforward tasks. Decide based on the work involved, your installation skills and the project’s effect on walls, services and cabinetry.
- Match the work to your skills. If the existing layout stays and the work involves straightforward cosmetic changes, you may be able to complete suitable tasks yourself. Cabinet installation still requires accurate measurements, appropriate tools and careful alignment. If you’re unsure about fitting cabinets or lack the necessary tools, professional assistance can reduce the risk of costly errors.
Bring in the right expertise when the renovation involves more than installing units. Depending on the work, a kitchen project may involve a designer, builder or cabinetmaker. For example, a carpenter may install new kitchen wall framing. Moving services or altering walls adds coordination requirements, so define responsibilities before work begins.
- Compare three quotes on the same scope. Labour costs can vary by location in Australia, so obtain at least three quotes for comparable work. Give each provider the same project description, covering the layout, cabinetry, benchtops, appliance positions and finishing work. Compare inclusions, not just the total. A clear scope helps reveal differences in materials, installation tasks and exclusions.
Use the same plans and measurements for each quote. If one proposal includes new wall framing and another keeps the existing walls, they don’t cover equivalent work. Note who coordinates each stage and how changes are recorded. This gives you a sounder basis for deciding whether to manage some tasks yourself or assign the full installation.
- Set the layout before choosing suppliers. Draw the kitchen and mark doors, windows, appliances and work areas. Check how drawers open beside the dishwasher, whether the fridge door clears nearby handles, and how people move between the sink and cooktop. A good layout supports storage and daily tasks, not just a balanced appearance.
Take the plan to cabinet and benchtop suppliers so their recommendations match the room. Compare standard cabinetry with custom options for unusual widths or awkward corners. Record product dimensions and finishes together; a door profile or handle can affect clearances. In Australia, make the design choices before ordering, while adjustments remain practical.
- Coordinate colours, samples and installation details. Choose a restrained palette by comparing cabinet doors, benchtop samples, flooring and splashback materials in the same light. For example, warm timber-look cabinetry can pair with a neutral benchtop, while contrasting handles add definition. Consider how lighting changes the appearance of colours throughout the day.
Confirm the chosen finishes, cabinet dimensions and appliance openings before suppliers prepare an order. Keep a written schedule of deliveries, installation and follow-on work. A builder is useful when several trades, structural tasks or installation stages need coordination; a simpler project may need professional support only for specialist tasks.
Luxury, minimalist and modern design ideas
A successful kitchen design balances appearance with practical use. Plan the floor layout, storage, lighting and finishes together so each choice supports how you cook and move around the room.
- Map the floor plan around daily movement. Mark the sink, cooktop, fridge, doors and windows before selecting a style. Keep the main routes clear, and allow at least 90 cm for walkways. If your plan includes an island, leave at least 1 metre of clearance around it. These dimensions help preserve access when drawers open and people move between work areas.
Check the available space against the island’s intended purpose. A preparation surface needs convenient access to the sink, while seating requires room for people to sit and move past. Don’t add an island just to create a focal point if it narrows the route between the kitchen and adjoining rooms.
- Choose a design direction before selecting finishes. For a minimalist kitchen, use a restrained palette, simple cabinet fronts and storage that keeps everyday items out of sight. A modern look can combine clean lines with a contrasting feature, such as a textured splashback or dark tapware. For a more luxurious feel, choose refined finishes and considered lighting rather than adding details everywhere.
Collect samples of cabinet colours, flooring, benchtops and splashback materials. View them together in both natural and artificial light in the kitchen. A pale palette can make a compact room feel open, while a darker island can add contrast without covering every surface in a deep colour. For those balancing space constraints, design specialists like Kitchen Renovations Perfected show how tailored storage and thoughtful details can elevate more compact layouts.
- Match details to function. Choose handles, sinks, tapware, appliances, lighting and flooring for appearance as well as practical performance. A broad sink, for example, can accommodate larger cookware, while drawers near the preparation area keep utensils close at hand. Select finishes that suit cleaning routines and everyday use, not just the initial design inspiration.
Plan task lighting over work surfaces and general lighting for the wider room. Keep the electrical layout aligned with the chosen fixtures and appliance positions. Leave at least 45 cm between benchtops and overhead cabinets, so the arrangement remains practical and the wall space works as intended.
- Document the final design before ordering. Record measurements, finishes, cabinet positions, appliance openings and lighting points in one detailed plan. Check that doors and drawers open without hitting nearby handles, walls or appliances. Review the full layout from the entry and adjoining spaces, as an open-plan kitchen is visible from several angles.
If your design requires electrical work for lighting or appliance connections, include that scope in the plan. For electrical support with those elements, contact WDC Services about electrical work. Coordinating placements with cabinetry and finishes helps keep the design cohesive and installation decisions clear.
WDC Services: Bathroom Renovations
WDC Services supports homeowners planning bathroom or laundry renovations, with electrical work available where it fits the project. Previous clients highly recommend the team for its professionalism, quality workmanship and attention to detail.
From planning through construction and installation, WDC Services focuses on quality finishes and clear communication. The team aims to be punctual and keeps you informed as work progresses, helping you understand project decisions and stages. Homeowners in Melbourne’s inner eastern suburbs can contact Dominic (Dom) Crupi about their renovation.
Call Dom on 0425801004 or email info@wdcservices.com.au to discuss your project.
Make your next renovation decision with confidence
Before work begins, turn your preferred design into a practical decision record. Note what matters most to your household, which choices are settled and what still needs coordinating. A kitchen renovation planning guide is most useful when it becomes a working reference, rather than just an early collection of ideas.
Walk through the room in your mind and picture an ordinary day, from putting away groceries to preparing a meal and cleaning up. This simple check can show whether the layout suits your routine. Share the plan with everyone affected by the work so expectations and decisions remain aligned as the project progresses.
If your wider home plans include work that fits WDC Services’ offerings, take the next step and contact WDC Services to discuss your project. Keep moving forward at a pace that lets you make considered choices and build a result that feels right for your home.
Frequently Asked Questions
How long does it take to fit a kitchen?
On-site kitchen renovation work is estimated to take 4-8 weeks, depending on the project scope and coordination. The fitting stage is only part of the overall schedule: planning, approvals, product ordering and custom cabinetry can add time before installation starts. Use your kitchen renovation planning guide as a schedule for deliveries and follow-on work. For example, a delayed benchtop can affect when the sink and appliances are fitted.
How Can I Save Money On My Kitchen Remodel?
Save by keeping sound parts of the existing kitchen and avoiding late design changes. Before ordering, compare quotes against the same written scope, including materials, installation and finishing work. Review samples at home before committing, as replacing a finish after ordering can mean extra work. Separate essential improvements from optional upgrades, then schedule optional items when they fit your budget.
What Is the Average Price to Renovate a Kitchen?
There’s no reliable average cost for every kitchen: scope, materials, appliances, labour and layout changes all affect the total. A cosmetic refresh and a full replacement involve different work, so compare estimates only when they cover similar tasks and specifications. For a specific project, the price depends on its requirements and is provided after a quote request. Review inclusions carefully before comparing totals.
What building regulations do I need to consider?
Consider the building requirements that apply to your renovation’s scope and location, especially if work changes walls, services or the layout. Requirements can differ between Australian states, territories and local areas. Before construction, establish whether the proposed work needs approvals or inspections. Keep plans, product details and decision records together so the relevant authority or building professional can assess the proposal.
How much does a kitchen renovation cost in Australia in 2026?
The cost in Australia in 2026 depends on whether you’re updating finishes or replacing the kitchen, along with materials, appliances, labour and service changes. A single national figure may not reflect local conditions or the project scope. In Melbourne’s eastern suburbs, compare estimates built from the same plans and specifications. Ask for a clear breakdown of included work and allowances before deciding.
How should I set a kitchen renovation budget and contingency?
Build your budget from itemised estimates for cabinetry, appliances, benchtops, labour and finishing materials, then set aside a 10-20% contingency for unexpected work. A kitchen renovation planning guide can help you rank decisions by importance, so essential functional needs take priority. Keep a record of orders, deposits and changes as the project progresses. If an unexpected issue arises, compare its cost with the remaining contingency before revising optional choices.
Do I need council approval or a building permit for a kitchen renovation in Australia?
Approval requirements depend on the renovation’s scope and local rules, so there isn’t one answer for every Australian kitchen. A surface refresh may differ from work involving structural changes or altered services. Describe the proposed work and location when seeking guidance from the relevant local authority or building professional. Do this before demolition or ordering materials, as a change in scope could affect your schedule.
What Australian building codes and electrical or plumbing rules apply to kitchen renovations?
Requirements depend on the work, state or territory, and local rules. Changes to electrical or plumbing services need careful coordination with the renovation sequence. Disconnection, relocation and reconnection aren’t ordinary cabinet-fitting tasks. For homes in Kew East, Deepdene, Box Hill, Balwyn, Kew, Camberwell, Surry Hills, Vermont, Doncaster, Templestowe, Rosanna and Viewbank, establish which local requirements apply before work begins.
Disclaimer
Please note this advertisement has been AI generated for entertainment and leed generation purposes and In some cases may not reflect the companies exact services and information.
Prior to engaging the company it is recommended that you seek clarification on some or all points in this advertisement .
Wdc services has many 5 star google reviews that can be used as a reliable and true testimony to the quality services proved to its customers over many years.
Contact Domenico ( Dom ) Crupi on 0425801005 or email info@wdcservices .com.au
for further information
Disclaimer: Disclaimer, Please note this advertisement has been AI generated for entertainment and leed generation purposes and In some cases may not reflect the companies exact services and information. Prior to engaging the company it is recommended that you seek clarification on some or all points in this advertisement. WDC Services has many 5 star google reviews that can be used as a reliable and true testimony to the quality services proved to its customers over many years. Contact Domenico ( Dom ) Crupi on 0425801005 or email info@wdcservices .com.au for further information.