
Last Updated: October 31, 2026
Quick Summary
The most affordable kitchen backsplash for a small renovation is usually ceramic or porcelain tile, or peel-and-stick panels for a cheaper, reversible option. Choose heat- and water-tolerant tile behind the cooktop and sink, and use a lower-cost option on the surrounding walls.
- Use heat- and water-tolerant tile behind the cooktop and sink.
- Peel-and-stick panels are the fastest and cheapest route, suited to renters.
- Keep vinyl and peel-and-stick panels away from direct cooktop zones.
- Light colours and glossy finishes make a small kitchen feel larger.
- Clean and dry the wall thoroughly, since grease causes adhesive failure.
Table of Contents
- Why a Backsplash Is the Smartest Small Kitchen Upgrade
- Affordable Backsplash Materials Worth Considering
- Small Kitchen Splashback Ideas That Make the Space Feel Larger
- DIY Kitchen Splashback Ideas You Can Install Yourself
- Kitchen Splashback Alternatives to Tiles
- How to Update a Kitchen Splashback Without a Full Replacement
- Booking Your Splashback Update With WDC Services
- Frequently Asked Questions
Why a Backsplash Is the Smartest Small Kitchen Upgrade
A kitchen backsplash is the wall surface between the benchtop and the upper cabinets, and it is one of the few kitchen updates that changes how a room looks without a full renovation. Many homeowners start with the backsplash because it is contained, visible and easier to budget for than new cabinetry.
For a small kitchen, that matters even more. The backsplash is a large, uninterrupted surface, so a good choice makes the whole room feel cleaner and brighter.
- It protects walls behind the cooktop and sink from splashes and grease
- It sets the colour palette for the whole kitchen
- It can be updated in a single day for many materials
Watch out: a backsplash that looks good in a showroom can still fail behind a cooktop if the material cannot handle heat or grease. Check that before you choose.
Affordable Backsplash Materials Worth Considering
Several materials give a finished look without a high price tag, but the right choice depends on your wall, your cooking habits and how much time you want to spend on installation. The table below compares the most common affordable options on the factors that matter most in a small renovation: upfront cost, heat and water tolerance, DIY difficulty and long-term maintenance.
| Material | Typical cost positioning | Heat and water suitability | DIY difficulty | Maintenance |
|---|---|---|---|---|
| Ceramic and porcelain tile | Low to mid | Good heat resistance; water-resistant when grouted and sealed | Moderate, needs adhesive, spacers, grout and a wet saw for cuts | Wipe clean; regrout every few years |
| Vinyl and peel-and-stick panels | Low | Limited heat tolerance; keep away from direct cooktop zones | Low, cut with a utility knife and press on | Wipe clean; replace individual panels if damaged |
| Painted or painted-glass panels | Mid | Good heat resistance for glass; painted surfaces need a heat-rated finish near the cooktop | Low to moderate, glass needs professional cutting and fixing | Wipe clean; avoid abrasive cleaners on painted surfaces |
| Brick-look veneer | Low to mid | Moderate heat resistance; porous unless sealed | Moderate, adhesive and sealant required | Seal periodically; clean with a damp cloth |
| Beadboard panelling | Low | Poor heat resistance; not suitable directly behind a cooktop | Low, cut and fix with adhesive and nails | Repaint periodically; watch for moisture swelling |
| Mirror panels | Mid | Moderate heat resistance; adhesive failure risk near heat | Moderate, professional cutting recommended | Wipe clean; replace if the silvering degrades |
Ceramic and porcelain tile remains the most popular choice for small renovations because it balances durability, cleanability and style range. Simple subway tile is still the most common style for 2026, according to Express Kitchens’ 2026 backsplash styles guide. For a small kitchen, a light-coloured tile with a narrow grout line keeps the surface visually calm.
Vinyl and peel-and-stick panels are the fastest and cheapest route, and they suit renters who need a reversible update. The trade-off is heat: most products are not rated for the zone directly behind a cooktop, so plan to keep them to splash zones beside and away from the hob.
Painted or painted-glass panels give a smooth, modern finish that wipes clean easily. Glass is the more durable option near heat and steam, but it usually needs professional cutting and fixing, which adds to the installed cost even though the material itself is mid-priced.
Brick-look veneer offers a warm, textured look with easier installation than real brick. It is porous, so it needs sealing, and it is better suited to walls away from direct heat and heavy splashing.
Beadboard panelling is a classic, cottage-style finish that is cheap to buy and easy to fit. It is not suitable directly behind a cooktop because it is combustible and moisture-sensitive, so use it on side walls or in kitchens with light cooking.
Mirror panels add light and perceived space, which is valuable in a small kitchen, but they need careful placement away from direct heat and heavy splatter, and adhesive failure is a risk if the wall is not flat.
For a small renovation, choose the material by zone: a heat- and water-tolerant tile behind the cooktop and sink, and a cheaper or more decorative option on the surrounding walls. This mix keeps the budget down without compromising safety.
Small Kitchen Splashback Ideas That Make the Space Feel Larger
Small kitchens need a backsplash that reflects light and avoids visual clutter. A plain, light surface carried across the full wall usually works better than a busy pattern.
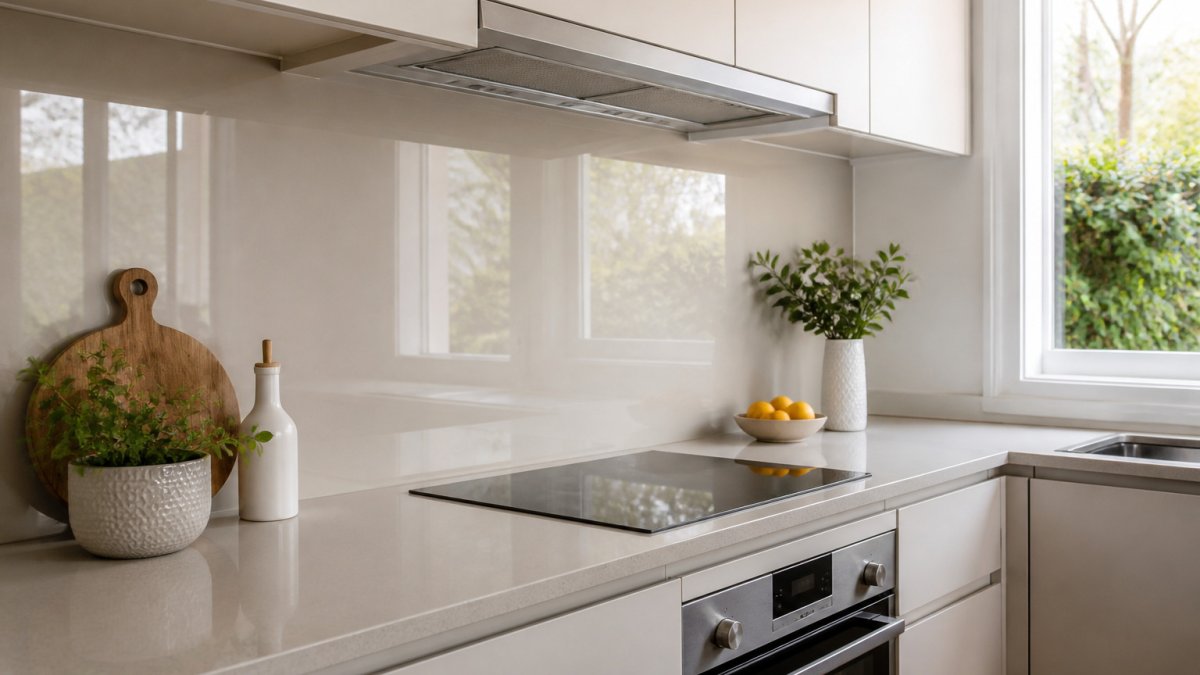
![A compact, bright kitchen with a light glossy splashback behind the cooktop and benchtop, natural light from a nearby window]
Splashback design in a small kitchen is about how the eye moves. Continuous lines and light colours do most of the work.
Light Colours and Glossy Finishes
Light colours reflect more light, so the room feels bigger. Glossy tiles add a further lift because they bounce light around the space. Matte finishes look softer but absorb more light, so use them with care in a dark or narrow kitchen.
Pairing a glossy splashback with a matte benchtop gives contrast without making the room feel smaller.
Running the Tile Height Up Behind the Cooktop
Taking the tile higher, up to the underside of the upper cabinets, creates one continuous band of colour. This makes the wall look taller and reduces the number of visible joins.
Behind the cooktop, this also gives better protection from heat and spatter. Make sure the tile and grout you choose are rated for that zone.
DIY Kitchen Splashback Ideas You Can Install Yourself
Some backsplash options suit a confident DIY homeowner, but the difficulty varies widely by material. The table below gives a realistic assessment of what each option demands in tools, time and skill, so you can choose one that fits your schedule and renovation scope.
| Material | Tools needed | Typical time for a small kitchen | Skill level | Main risk |
|---|---|---|---|---|
| Peel-and-stick panels | Utility knife, straight edge, tape measure, roller | Half a day | Beginner | Poor adhesion on greasy or uneven walls |
| Ceramic or porcelain tile | Wet saw or tile cutter, notched trowel, spacers, grout float, sponge | One to two days | Intermediate | Uneven cuts and grout haze |
| Painted glass panels | Professional cutting and fixing usually required | One day with a installer | Advanced | Measurement errors are costly |
| Brick-look veneer | Adhesive, sealant, saw, trowel | One day | Intermediate | Sealing gaps and edges |
| Beadboard panelling | Saw, adhesive, nails, caulk, paint | Half a day to one day | Beginner to intermediate | Moisture swelling and paint finish |
Peel-and-stick panels are the most beginner-friendly option. The main skill is surface preparation: the wall must be clean, dry, flat and free of grease, or the adhesive will fail. Measure the wall width and height, add a small margin for cuts, and dry-lay the panels before removing any backing.
Ceramic and porcelain tile is a manageable DIY project for a confident homeowner, but it is the option most likely to show mistakes. You need a wet saw or tile cutter for accurate cuts, and the layout must be planned so you do not end up with thin slivers at the ends of the wall. Allow one to two days for a small kitchen, including grouting and cleanup.
Painted glass panels are rarely a true DIY option because the glass must be cut and fixed accurately; a measurement error can ruin an expensive panel. Treat this as a professional installation even if you manage the rest of the renovation yourself.
Brick-look veneer is intermediate: the fitting is straightforward, but sealing the surface and edges properly takes care and affects how well it handles splashes.
Beadboard panelling is beginner-friendly to fit, but the finish, caulking, priming and painting, is what makes it last. It is not suitable directly behind a cooktop.
Before you start any option, clean the wall thoroughly and remove any grease. Surface preparation makes the biggest difference to how long the finish lasts.
- Measure the wall width and height, then add a small margin for cuts.
- Clean and dry the wall, and fill any holes or cracks.
- Dry-lay the tiles or panels to check the layout.
- Apply adhesive or peel-and-stick backing, working from the bottom up.
- Let it set, then grout or seal the joins if the material needs it.
A common mistake is skipping the dry layout. Starting in the wrong corner can leave thin, awkward cuts at the end of the wall. Another is tiling over a greasy or dusty wall, which causes adhesive failure within months.
Kitchen Splashback Alternatives to Tiles
Tile is not the only option. Several alternatives can suit a small renovation budget and a different look.
- Painted glass: A sleek, one-piece look that is easy to wipe clean
- Beadboard panelling: A classic, cottage-style finish
- Mirror panels: A way to add light, though they need careful placement
- Sintered stone or natural stone slabs: A premium option that carries the benchtop up the wall, and usually costs more than tile
Each alternative has trade-offs in heat resistance, water resistance and cleaning. Check these before you decide.
How to Update a Kitchen Splashback Without a Full Replacement
You do not need to remove cabinets or replace the benchtop to refresh the look. Many homeowners update the splashback alone and get a big change for a modest effort.
Start by removing the old tile or panel carefully, checking the wall for damage underneath. Repair any problems first, then fit the new surface. This approach keeps the cost and mess low.
Booking Your Splashback Update With WDC Services
If you want a splashback update done properly, WDC Services can manage the whole job. We work on kitchen, bathroom and laundry renovations, and we bring together electrical, carpentry, waterproofing and tiling under one project plan.
Contact us to talk through your kitchen and discuss your options.
Please note this advertisement has been AI generated for entertainment and lead generation purposes and in some cases may not reflect the company’s exact services and information. Prior to engaging the company it is recommended that you seek clarification on some or all points in this advertisement. WDC Services has many 5 star Google reviews that can be used as a reliable and true testimony to the quality services provided to its customers over many years. Contact Domenico (Dom) Crupi on 0425801005 or email info@wdcservices.com.au for further information.
Frequently Asked Questions
What is the most affordable kitchen backsplash option?
Peel-and-stick panels and vinyl sheets are usually the lowest-cost route, because they need no tiling tools, grout or adhesive. Basic ceramic tile is also budget-friendly when you buy in standard sizes and lay it yourself. Costs vary with the material, the area you need to cover and whether you hire a tradesperson, so compare quotes for your specific kitchen. For current pricing on WDC Services renovation work, visit wdcservices.com.au or contact the team for a quote.
What can I use instead of tiles for a kitchen splashback?
Common alternatives include painted or toughened glass panels, stainless steel sheets, vinyl panels, beadboard, and sintered stone slabs carried up the wall. Each suits a different look and budget. Check heat and water tolerance before you choose, especially directly behind the cooktop and sink, where the surface meets the most wear.
Can I install a kitchen splashback myself?
Many peel-and-stick and panel-style splashbacks are designed for DIY installation, and simple tile work is within reach of a careful homeowner. Surface preparation matters most: the wall needs to be clean, flat and dry before any adhesive goes on. Electrical outlets and fittings should be handled by a licensed electrician, and larger or more complex jobs are often better left to a professional renovator.
How do I choose a splashback for a small kitchen?
In a small kitchen, lighter colours, glossy or reflective finishes and a continuous surface from benchtop to cabinet help the space feel more open. Run the splashback up to the underside of wall cabinets to avoid a cluttered line. Measure the wall areas carefully before ordering, since small kitchens often have awkward gaps around windows and appliances.

Disclaimer: Disclaimer, Please note this advertisement has been AI generated for entertainment and leed generation purposes and In some cases may not reflect the companies exact services and information. Prior to engaging the company it is recommended that you seek clarification on some or all points in this advertisement. WDC Services has many 5 star google reviews that can be used as a reliable and true testimony to the quality services proved to its customers over many years. Contact Domenico ( Dom ) Crupi on 0425801005 or email info@wdcservices .com.au for further information.