
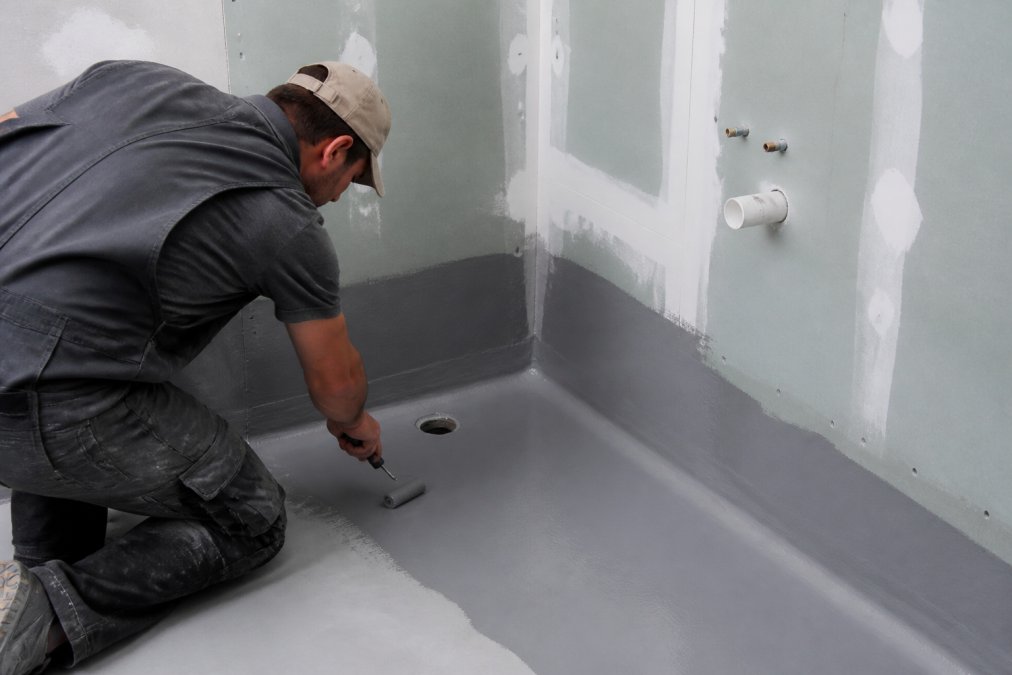
Table of Contents
- What You’ll Need Before You Start
- Step 1: Surface Preparation for a Waterproof Bathroom
- Step 2: Priming and Sealing Joints, Corners and Penetrations
- Step 3: Applying the Waterproofing Membrane
- AS 3740-2021 Waterproofing Requirements Explained
- How Long Does Waterproofing Take to Dry?
- Signs of Bathroom Waterproofing Failure
- DIY vs Professional Bathroom Waterproofing
- Frequently Asked Questions
Last Updated: September 20, 2026
What You’ll Need Before You Start
A waterproof bathroom comes down to preparation and the right materials.
- Membrane and primer from a single manufacturer’s system
- Reinforcing tape or matting for corners and junctions
- Silicone sealant and a bond breaker tape
- Cement-based tile underlay or fibre-cement sheet
- Moisture meter
- Paint roller with a short nap, plus a brush for edges
- Notched trowel, mixing paddle and drill
- Disposable gloves and eye protection
Never mix waterproofing components from different manufacturers. The products are tested as a complete system, and a mismatched primer or sealant can stop the membrane bonding properly. The consequence is a failed flood test and a full strip-out.
Step 1: Surface Preparation for a Waterproof Bathroom
Surface preparation decides whether the membrane sticks. Skip it and everything above it fails.
Cleaning and Repairing the Substrate
The substrate must be clean, dry, sound and free of anything that stops adhesion.
- Remove all dust, oil, grease and old adhesive
- Fill cracks and holes with a suitable patching compound
- Replace loose or crumbling render
- Check that the floor falls towards the floor waste
- Sand back any high spots that would pond water
Checking Moisture Content
New screeds and concrete must be dry before coating. A moisture meter gives a reading, and most membrane makers publish a maximum moisture content in their technical data.
Test in several spots, not just one. Slab moisture varies across a room, and the wettest corner is the one that will fail first.
Step 2: Priming and Sealing Joints, Corners and Penetrations
Priming and joint sealing are the two steps most DIY guides rush, and the two that decide whether the system holds.
Applying Surface Primer
Surface primer is a bonding agent that prepares the substrate for the membrane. Apply it with a roller or brush in a thin, even coat, and let it dry for the time stated on the product data sheet.
Silicone Sealant and Bond Breaker at Junctions
Every change of plane needs a flexible seal before the membrane goes down: wall-to-floor junctions, wall-to-wall corners, and around any penetration.
Reinforcing Tape and Floor Waste Sealing
Reinforcing tape goes into the wet sealant at every junction, then gets covered with more sealant and membrane. This stops the membrane splitting as the building moves.
Step 3: Applying the Waterproofing Membrane
Membrane application is where thickness and coverage matter most. Two thin coats beat one thick one, every time.
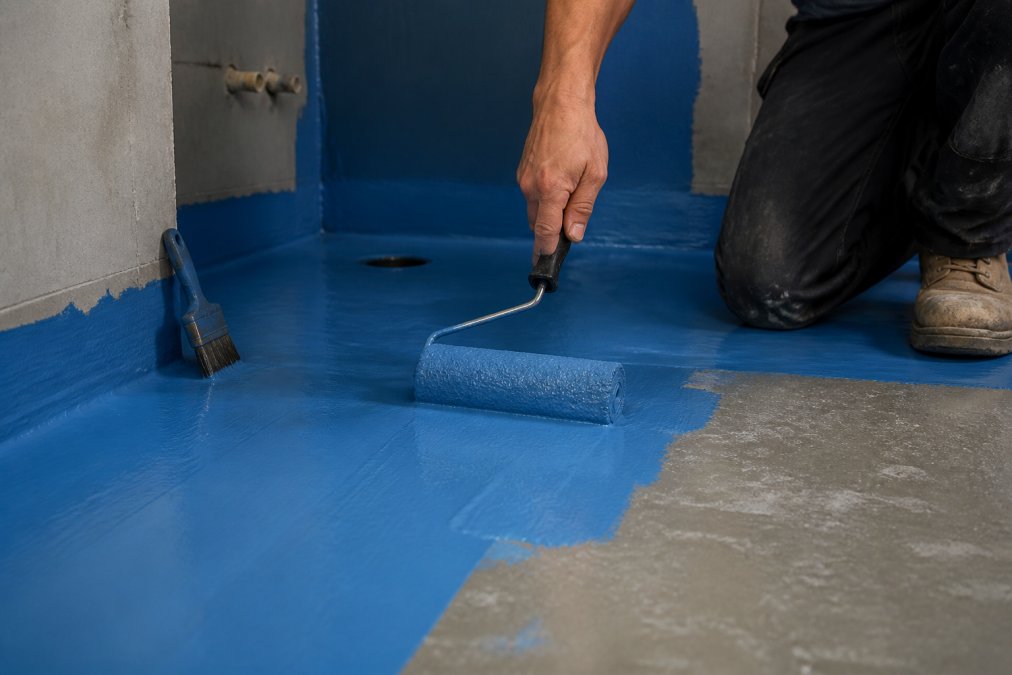
Roller vs Brush Application and Thickness
Use a roller for open floor and wall areas, and a brush for corners, edges and penetrations. Rollers give an even film; brushes reach the tight spots a roller cannot.
Material Compatibility Guide
Stick to one system. Primer, sealant, tape and membrane should all come from the same maker, because that combination is what was tested.
| Component | Match to | Why it matters |
|---|---|---|
| Primer | Same brand as membrane | Wrong primer can stop the bond |
| Silicone sealant | Neutral cure, substrate suitable | Acid-cure sealant can attack some substrates |
| Reinforcing tape | Membrane system | Generic tape may not saturate properly |
| Tile adhesive | Membrane manufacturer’s list | Some adhesives react with uncured membrane |
AS 3740-2021 Waterproofing Requirements Explained
AS 3740-2021, Waterproofing of domestic wet areas, sets out where a waterproof membrane is required in a domestic bathroom, how high it must go, and how it must be installed. It is called up by the National Construction Code, and is the document a building surveyor, certifier or insurer measures the work against.
- Waterproof, a continuous membrane over the whole area, including the floor and the walls up to the required height.
- Water resistant, a surface that resists moisture but is not a full membrane, used in areas that only see occasional splashing.
Where the membrane must go
The detail most DIY guides skip is the geometry. The standard ties membrane coverage to the shower, bath and vanity, and the boundaries are specific:
- Shower area, the floor of the shower and the walls of the shower enclosure must be waterproof. The membrane must extend beyond the shower enclosure, not stop at the screen line, because water tracks sideways under the tiles.
- Wall heights, the membrane must rise to a minimum height on the walls around the shower, and higher again where the shower rose is fixed to the wall. The exact figure depends on the shower configuration, so check the current edition of the standard rather than working from memory.
- Bath, the floor under and around the bath, and the walls adjacent to it, need waterproofing to a set height and a set distance from the bath edge.
- Vanity and basin, the wall behind and beside the vanity needs protection to a defined height and width, because splashing at the basin is constant.
- Floor wastes and penetrations, every floor waste, pipe penetration and junction must be sealed and reinforced as part of the membrane system.
Why the boundaries matter
A non-compliant wet area can fail inspection, void insurance cover for water damage, and have to be stripped out and rebuilt. The cost of redoing it is far higher than the cost of getting the membrane boundary right the first time.
The National Construction Code sets the performance requirements that AS 3740 supports, so demonstrating compliance with the standard is how you show the wet area will perform. If you are renovating and a certifier is involved, confirm which edition of the standard applies to your project before you open a bucket.
AS 3740-2021 is not optional guidance. It defines where the membrane starts and stops, and it is the benchmark your certifier, insurer and any future buyer will measure the work against.
::: Strict adherence to these standards ensures the structural integrity of your wet area, though you must also address the underlying foundation by stopping subfloor dampness before the membrane is applied.
How Long Does Waterproofing Take to Dry?
Drying is not one event. A membrane goes through three stages, and confusing them is a common reason a wet area fails after tiling.
- Touch dry, the surface is no longer tacky. This is the point at which you can apply the next coat. It is typically a few hours, not a day.
- Recoat window, the period during which the next coat will still bond chemically to the first. Miss it and you may need to abrade the surface before recoating. Check the product data sheet for the window.
- Full cure, the membrane has reached its design strength and is ready for a flood test and for tiling. This is measured in days, not hours, and it is always longer than the touch-dry time.
What slows curing down
- Cold weather, most membranes have a minimum application temperature, often around 10°C, below which they will not cure properly.
- High humidity, moisture in the air slows the cure of solvent and water-based products alike.
- Poor ventilation, trapped vapour keeps the film soft.
- Thick coats, a heavy single coat skins over on top while staying wet underneath, which can trap solvent and cause blistering.
What speeds it up
- Warm, dry air within the manufacturer’s stated range.
- Good airflow through the room, without directing a heater straight at the membrane.
- Thin, even coats applied at right angles, rather than one thick coat.
The flood test, the step most guides skip
A typical flood test procedure:
- Confirm the membrane has reached full cure, not just touch dry.
- Block the floor waste and any other outlets.
- Fill the floor area with water to a depth of around 20-30 mm, covering the whole membrane and lapping up the walls to the required height.
- Mark the water level on the wall so you can see any drop.
- Leave it for the period stated by the manufacturer or the relevant standard, commonly 24 hours.
- Check the water level and inspect the ceiling below and adjacent rooms for any sign of moisture.
- Drain, allow the membrane to dry, then proceed to tiling.
Photograph the flood test, the filled floor, the marked water level, and the reading after the test period. It is the single most useful piece of evidence if a certifier, insurer or future buyer ever asks how the wet area was verified.
Do not tile over a tacky membrane, and do not assume a flood test can be done the same day as the final coat. Cure time and the flood test are two separate waits, both printed on the product data sheet.
Signs of Bathroom Waterproofing Failure
The signs of bathroom waterproofing failure usually show up as damp, smell or movement, not a visible hole in the membrane.
Watch for:
- Musty smells that do not clear with ventilation
- Paint or render bubbling on the wall behind a shower
- Grout cracking in a straight line along a junction
- Tiles lifting or sounding hollow when tapped
- Damp patches on the ceiling below the bathroom
- Mould returning in the same spot after cleaning
DIY vs Professional Bathroom Waterproofing
DIY bathroom waterproofing can work if you follow the standard, use one complete system and get the details right at junctions and penetrations. The catch is that the details are exactly where most DIY jobs fail.
- A documented system that matches the manufacturer’s tested combination
- Correct surface preparation and moisture testing before coating
- A compliance record that satisfies your certifier and insurer
Frequently Asked Questions
How can I waterproof my bathroom without removing the tiles?
You can’t reliably waterproof over existing tiles because the membrane needs to bond to a clean, porous substrate. Products marketed as tile-over waterproofers may work short-term, but they often fail at joints and penetrations. The proper method involves removing tiles, preparing the substrate, and applying a certified membrane. If you’re not ready for a full renovation, a professional can assess whether a topical sealer might buy you time, but it won’t meet AS 3740-2021.
What are the Australian Standards for bathroom waterproofing?
AS 3740-2021 sets the requirements for waterproofing domestic wet areas. It specifies where membranes must be applied, minimum heights for shower recesses (at least 150 mm above the floor and 1800 mm in shower areas), and how junctions and penetrations should be treated. Compliance is mandatory for new builds and renovations. Your waterproofing certificate should reference this standard.
How long does bathroom waterproofing take to cure before tiling?
Curing time depends on the membrane type, temperature, and humidity. Most liquid membranes need 24 to 48 hours before you can tile, but some require up to 72 hours. Always check the manufacturer’s data sheet. Rushing this step traps moisture and can cause delamination. In cooler months, allow extra time. A moisture meter can confirm the membrane is ready.
Do I need a licensed professional to waterproof my bathroom?
DIY waterproofing is possible but risky: mistakes often show up years later as mould or structural damage. For peace of mind and warranty, hiring a professional is recommended.
Disclaimer: Disclaimer, Please note this advertisement has been AI generated for entertainment and leed generation purposes and In some cases may not reflect the companies exact services and information. Prior to engaging the company it is recommended that you seek clarification on some or all points in this advertisement. WDC Services has many 5 star google reviews that can be used as a reliable and true testimony to the quality services proved to its customers over many years. Contact Domenico ( Dom ) Crupi on 0425801005 or email info@wdcservices .com.au for further information.